Tuesday, December 22, 2009

Christmas Guest Chef

We had a guest chef in the PBE kitchen this morning. She comes from a long line of fantastic cookie bakers. I felt honored just to be in the same kitchen let alone her helper.


Here are her 2009 Christmas Cookies. I'm sure they'll be copied as soon as the public sees them. I'm just hoping she lets me help her again next year.

Wednesday, October 28, 2009

Shut the door, I'm dressing!

One of my favorite cookbooks is The Junior League of Pasadena California Heritage Cookbook. I've had it since 1976. My dog, as a puppy, chewed the corner and many of the pages have stains. I love this cookbook. One of my favorite recipes is something they call Mexican White Dressing. Reading the recipe you might also wonder why it's called this, it's puzzled me forever.

This is one of those sweet dressings that goes well with avocado and citrus salads but the following is an old standby of mine. First, the dressing.

Mexican White Dressing
1 cup canola oil
1 teaspoon celery seed
1 tablespoon of powdered onion
4 tablespoons sugar
1/2 cup white vinegar
1 teaspoon Dijon mustard
1 teaspoon salt

Mix all the ingredients in a 1-quart covered jar and allow to stand at room temperature for 24 hours. Refrigerate 1 hour before serving. Shake well just before using. This dressing will keep for 1 week in the refrigerator.

Now, the salad. It couldn't be easier. You can add candied nuts or Gorgonzola, whatever you enjoy. The sweet dressing is a wonderful compliment to the strong cheese.

Napa Cabbage Salad
Chop into bite-sized pieces a medium head of Napa cabbage.
To this add walnuts and crumbled blue cheese and toss with dressing.

Friday, October 16, 2009

Artichokes and cream: what's not to love

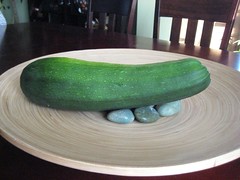
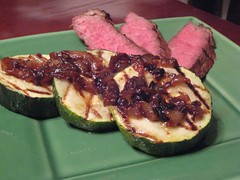
If life were perfect I would have created this dish but nope, it wasn't me. It was another food blogger, Ree Drummond at Pioneer Woman. She's just come out with a cookbook but I've been reading her blog all along. She takes a million photos of the process for each recipe and has fun doing it. She has a handful of home schooled kids and a working cattle ranch. She is way too organized but has an honest blog that is fun to read and is a damn fine cook.

Spaghetti with artichokes and tomatoes

She touts this as almost entirely made from the pantry and I did use canned artichoke hearts but I had enough fresh Roma tomatoes so I blanched and pealed them. I had thought frozen artichokes but they might be to watery and Trader Joe's has a very nice canned product. It is easy, quick and very filling. I like to have a meatless dinner ever so often and this fits the bill.

Ree added the cheese a bit differently. Hot pasta into a bowl, drizzle with olive oil and then sprinkle a fair amount of grated Parmesan. Then top with the hot sauce. I think that helped to incorporate the cheese better. And like her, I use tongs to help mix this all together. Where ever would I be without tongs. They are on my family crest.

Editor's note: I got so wound up about this dish I missed one thing. It was delicious! My beloved enjoyed it and didn't even miss the meat. I could have eaten the whole bowl but held myself in check. Red sauce is on for me but I really have trouble with the acid. This had a yummy tomato flavor without the acid-reflux I usually experience. Do make this. Go to the store right now.

Monday, September 14, 2009

Hot Fudge

Sometimes hot fudge sundaes for dinner is just what you need. I mean, really, let's throw caution to the wind and enjoy what we want. Life is stressful enough these days, but I'm an optimist; I feel we are getting better.

When my beloved decided he wasn't hungry for dinner I asked if he had room for dessert. He quickly agreed he had room for a hot fudge sundae. Friday we had friends over for dinner and since I don't bake much in the summer, we had a simple dish of ice cream with peach sauce for dessert. That meant there was ice cream left in the freezer.

A few days ago, in an unusual fit of cleaning, I ran across a recipe for my mom's hot fudge. This was not your usual chocolate syrup this was something divine. I had never made it but had asked mom quite a few years ago how she concocted this delightful pleasure. It is way too easy.

Hot Fudge
1 can of sweetened condensed milk (try some of the La Lechera that Doodles posted about)
powdered cocoa
milk
pinch of salt (optional)

In a small sauce pan heat the condensed milk slowly and whisk in enough cocoa powder to taste. Some people like it more chocolaty than others. As it heats, thin it to the right consistency with milk. You want to be able to pour the syrup. Add a pinch of salt. Heat and stir until it's smooth, no need to come close to a boil.

Pour over your favorite ice cream but pour enough you want a bite of that tasty fudgy syrup with each bite of ice cream.

Friday, September 11, 2009

It's September

Some areas of the country are beginning to feel some coolness to their weather, not where we are but hey Southern California always has to be different.

I read somewhere that September is National Fruits & Vegetable month. Well I know for a fact that there are some tasty fruits around this time of the year. Farmer's Markets have an abundance of fruits and veggies and for that I am so thankful.

But have you noticed in your market the vast supply of avocados, my word this must be a bumper crop year. Oh and where we are right now the price is very good thank you very much.

I love me a good avocado salad with red onion, chick peas, chopped tomatoes and for a dressing just fresh lime juice and good extra virgin olive oil, salt and pepper. I add chopped cilantro but not everyone likes this herb so leave it out if you want. If I have some red cabbage or even savoy cabbage, I slice that thin and add it, gives it a crispness Maybe add some fried/baked tortilla strips to use instead of croutons.

But one of my favorite ways to eat an avocado is to mash it with a little lime and salt and add just about a nickel size dollop of some pepper paste, you know that stuff you get in a tube, add that, then spread it on a piece of sourdough bread that has been under the broiler for a few seconds.

Well since it's still September I'm gonna go think of some fruits and veggies to share that is a bit out of the ordinary.................do you have some to share?..................email and I'll post them as well................stay tuna'd

Thursday, September 03, 2009

Sweet

We had company the other nite for dinner...........friends were leaving so I made a pork roast with all the trimmings, nothing special just the carrots, onions and potatoes. What I liked the best was the gravy I made from the juice, quite tasty with the addition of the smokey paprika I rubbed on the roast.

But this post is not about the main meal it's about my new favorite desert or should I say desert addition. It was a bit too warm to bake a pie or a cake. And given the time of year and the great fruit that abounds in this area at
least.

Peaches are at the top of my list with a few blueberries and raspberries added as well as some toasted pecan pieces added after a drizzle of this delectable sweetened condensed milk. I just recently found this product and was quite pleased with the fact it is not as heavy sweet like the sweetened condensed milk I have been using for many, many years.
The wonderful locally grown peaches are spectacular, added to the peaches were some dried cranberries and some toasted sliced almonds.


Next up using this to make my key lime pie recipe..............that will be the real test I'm thinking.

Friday, August 28, 2009

Not enough butter in your diet? We have the answer

Buttercream Frosting! I was feeling like the blood through my arteries was moving much to fast so I decided to make honest to goodness buttercream frosting. This is a Cook's Country recipe and it's pretty easy though I'm sure very high in cholesterol. This recipe makes enough for a small cake or about 24 cupcakes. I cut it in half for 15 and I still had a bit left. What ever to do with a 1/4 cup of frosting?

Buttercream Frosting
4 large eggs
1 cup granulated sugar
2 teaspoons vanilla extract
pinch table salt
1 pound unsalted butter, softened and each stick cut into eights

Combine eggs, sugar, vanilla, and salt in bowl of standing mixer, place bowl over pan of simmering water. Whisking gently but constantly, heat mixture until thin and foamy and registers 160 degrees on instant-read thermometer.

Beat egg mixture on medium-high speed with whisk attachment until light, airy, and cooled to room temperature, about five minutes. (I put an ice pack around the outside of the bowl because it was pretty hot in my kitchen.) Reduce speed to medium and add butter, one piece at a time. (After adding half the butter, buttercream may look curdled; it will smooth with additional butter.) Once all butter is added, increase speed to high and beat 1 minute until light, fluffy, and thoroughly combined. (Can be covered and refrigerated up to 5 days.) Do let it warm up and restir to make it fluffy and spreadable again.

I frosted the cupcakes and sprinkled some toasted sugared slice almonds. Just perfect. I kept them refrigerated until a few minutes before serving because that butter sets up solid when cold, just like it does in your arteries.

Monday, August 24, 2009

a new find.............goat cheese

Not a new find to me but to my dear husband. While checking out the local farmers market Mr Doodles found the goat cheese vendor. My word you would have thought he had found the hope diamond but he did find some killer goat cheese.

What Mr liked was the creaminess of the cheese with the additions of dried cranberries. Then there was a variety with the cheese in a jar with lemon juice,good olive oil, a sprig of fresh rosemary and some black peppercorns. Another variety was plain cheese rolled in a variety of items, one was cilantro very finely chopped. So because Mr was enthralled with the cheese he had to have a very long chat with the fellow who was also the owner,he and his wife are the owners actually, wife happened to be at another farmers market.

We went to lunch later and I was telling Mr about 'lil bird', my sweet niece, wanting to have a few goats and make some cheese. Well he laughed hysterically and said if only we were younger we would do that. We had one goat once upon a time, Doone was a very sweet goat. Mr reminded me a a cute photo of sweet niece feeding Doone but Doone decided he liked niece's dress she was wearing and started chewing on the hem. As I remember it was Easter and 'lil bird' was dressed in all her Easter finery. I think I'm gonna look for that photo.

Anyway back to the goat cheese,
one of the cheeses I purchased was the creamy goat cheese rolled in some wonderfully sweet and moist dried cranberries.

Gonna go look for some recipes that uses goat cheese............stay tuna'd.

Thursday, August 20, 2009

Reprise of an old favorite: part two, the guacamole


You can hardly call this guacamole since there is so little avocado in it but that's what they call it at Cielito Lindo's. You can call it damn delicioso and put it on anything, well maybe not dessert.

Let's get this finished. I had so many pix for the first installment and my camera decided to be uncooperative for the second so we are gonna proceed photoless.

Take the approximately 3 cups of the Salsa Verde you made from the previous post and add one half a medium sized ripe avocado. Yes, that is correct, one half, 1/2, or medio; however you say it–it's just a tiny bit of the whole sauce.

Liquefy in the blender until smooth and bring to a simmer in a small sauce pan. Simmer for about five minutes. This cooks out the "raw" taste of the avocado. Not a bad taste but somehow different once you cook it.

Now thin with a bit of what's called in the restaurant biz, "profit". That would be water to us folks. This sauce is very thin, like a heavy tomato juice. Adjust the salt and let this cool; refrigerate and serve cold over the taquitos. It is also good on tacos and I love it mixed in with frijoles.

I hope this helps the readers who can't make it to downtown Los Angeles for their taquito fix and maybe spur someone else to try this classic Olvera Street favorite.

Wednesday, August 19, 2009

Reprise of an old favorite: part one, salsa verde

Editors note: Lots of photos on a blog site, not my thing but sometimes you need to show the process so if you have a slower computer, I sincerely apologize, there are many photos with this posting.

We've received a number of questions about the Guacamole Sauce used at a famous taquito stand in Los Angeles. Ok, two is a number, right? I posted about recreating the recipe and came pretty close. If you've been to Cielito Lindo's you know what the big fuss is about. Recently, we've had a few other questions and I thought it time to do a thorough post, with pix, to help everyone out. Since this can be a complicated recipe and would be too long for any sane person to read, I'll serialize it.

First you need to make the Salsa Verde. I rarely make it from scratch because I live near an ethnic Mexican market that makes it fresh but if you can't find this make this recipe or find canned, Herdez Salsa Verde. It works in a pinch. Do stay away from any canned Salsa Verde that has sugar, yuck. Once in a while I find canned tomatillos just packed in brine. This will work too but you have to cook the other veggies so why not do it all.

1 lb of Tomatillos, husked removed
Note: These look like green tomatoes with a papery skin. Peel off the skin and wash the tomatillos thoroughly. They are sticky, very sticky; they should make glue from tomatillos.

3 whole jalapeño peppers
Note: I use Fresno Hots because I grow them in the summer. These are hot mamma jammas and need to be treated, as all hot peppers, with respect. Seriously wear gloves and wash before you touch any skin, yours our someone else's. I also used one of my Anaheim Green chillies, they have such great flavor but you can make it with just jalapeños.

7 or 9 cloves of garlic, peeled
1 medium white onion, quartered
(I know the photo shows a brown onion)
1 can of 14.5 oz. chicken broth

a small bunch of cilantro with stems, about a cup roughly chopped
1/2 teaspoon ground cumin

Cut the tomatillos in quarters. See why? You can't tell from the outside if it's got a bad spot.
Cut the peppers in quarters and if they are really hot remove the seeds.
Cut onions in quarters and peel the garlic.

Everything, including chicken broth goes into a pot. Don't worry if the broth does not cover the vegetables. Bring to a boil and simmer with lid on for about 20 minutes or until everything is soft.
Because you can never be sure how hot your chillies are you can, in a separate pan, boil a few chopped and seeded chillies.

This will smell wonderful. I believe this is what heaven smells like.

I took this snap before I added the cilantro stems but don't bother chopping them everything will go into the blender when cooked. Give it a taste and if it isn't hot enough for you add a few of the extra cooked chillies. If it's too hot, I have no idea, it's never been too hot for us. It needs to have some heat. Adjust the salt.

Here it is finished cooking. Now, didn't that all go together nice? Yes, it did.Let this cool before you process it, please. I have had Salsa Verde colored kitchen walls before. You could use the salsa, to cook pork or chicken or a sauce for enchiladas. It is very versatile.
For our Guacamole recipe whir in a blender until completely liquefied. Strain the salsa through a fine mesh strainer while you push it through with the back of a spoon. I strain it this way because the tomatillo has those pesky little white seeds. You do what you want but the resulting sauce should be quite smooth. You should have somewhere near 3 cups.
You are halfway there. Stay tuned for the second installment of the recipe; making the guacamole. It is totally different from guacamole you eat with your chips in a Mexican restaurant. It is for dipping taquitos and licking the plate after.

Use one quart of the Salsa Verde in my version of Chilaquiles.

Saturday, August 15, 2009

It's cantaloupe time

I don't know about you but I am quite fond of cantaloupe, especially now since I discovered this brand of melon. Did I tell you about this last year, well even if I have, it is well worth repeating.

Rocky Ford is an area in south east Colorado. If by chance you should run into a cantaloupe that has this sticker on it grab it, take it home and you will be thanking me forever. Now if you cannot find Rocky Ford cantaloupe, well I am so very sorry, wish I could send y'all some cause these melons are perfect just what a cantaloupe should taste like.

And yes I have made my infamous (in my own mind) cantaloupe salad and will be making it again for a friendly gathering.

Tuesday, August 11, 2009

Ridiculously short Shortbread Cookie


They do not travel well; you can hardly get them to your mouth in one piece.
Forget about putting them in a cookie jar, you have only crumbs.
Do not dip them in coffee; they disintegrate.
The better the butter, the better. (I love that sentence, read it again)
They must be beaten for 10 minutes; no more, no less and baked immediately.

Ok, that all the bad things about these cookies, here is the one reason you will run right out and make them: These are the lightest cookies you will ever put in your mouth. Do I have to say more?

Shortbread Cookies (this recipe can be cut in half very easily)

1 lb unsalted butter, softened but not too soft.
4 cups flour
1 cup powdered sugar
1 pinch of salt

Beat for 10 minutes with a stand mixer. Pip from a pastry bag with a large tip onto parchment.
Bake 350 for 15-17 minutes. Just brown on the edges. Let cool about a minute on cookie sheet and remove to a rack to cool.

Friday, August 07, 2009

Who needs a recipe?

For Lemonade, well, honestly–I do. If I just throw in sugar, water and lemon juice I'm futzing around adding more juice or sugar, oops, now it's too strong and I need more water so I adhere to a recipe.

Since I have a beautiful lemon tree right outside my door I don't have to buy lemons and usually by this time of the summer we are begging visitors to take bags home. Unfortunately the drought has hit close to home in more ways than one and my lemon tree seems to be suffering a bit. The lemons are smaller and not as plentiful but I did have a few dozen to make up a batches of concentrate to freeze for a later use.

This recipe is so simple I never change it.

1 cup fresh lemon juice
3/4 cup sugar
4 cups water
1 lemon sliced

I make a simple syrup from 1 cup of water and the sugar then add the water, lemon slices and juice. I have no idea how long it last because it's usually gone that day.

For the concentrate: combine sugar and lemon juice is a small container; mix until sugar is dissolved. Freeze. Defrost slightly and add the water and sliced lemon.

A tall glass with lots of ice is the fav here and on occasion, a shot of Raspberry Rum. Yum.

Sunday, August 02, 2009

I have never met a biscuit I didn't like


But when I saw that Dutch Girl found a copycat recipe for the Red Lobster cheese biscuits I quickly went to print out her recipe. The photo of the gems were perfect and brought back some wonderful memories.

When I lived in South Florida and my Momma lived about a hundred or so miles north I ventured up the interstate quite often. We would go to a movie and then have a late lunch early dinner. One of Momma's favorite spots for lunch was to go to Red Lobster for lunch. Always ordered the very same thing a large bowl of clam chowder, a small Caesar salad and an iced tea. With any meal you receive a basket of these biscuits................dang they are good!!!

So if you like those biscuits then you are gonna love this recipe. Don't thank me thank Kay for bringing them to our attention.

Now for the recipe for Faux Red Lobster Biscuits
ingredients 2 cups Bisquick 1/2 tsp garlic powder 1 tsp garlic salt 1/2 tsp onion powder 1 1/2 cups grated cheese 2/3 cup buttermilk 3 tbs butter 2 tsp oregano Optional: 4 sun-dried tomatoes Use a large mixing bowl to combine the bisquick, garlic & onion powder, grated cheese and sun-dried tomatoes. Add the buttermilk and mix til the dough is firm. Drop spoonfuls on a baking sheet lined with baking powder. Melt 2 oz butter and mix in 1 tsp garlic salt and 2 tsp dried oregano. Brush half of the mix on top of the biscuit. Bake the biscuits at 400 degrees for 12-15 minutes, until golden brown. Remove the biscuits from the oven and brush the remaining butter mix on top.

My notes for these biscuits..................I did not use sun-dried tomatoes since I had none on hand, next time maybe, also I would use fresh chives and I did not use oregano.

Kay I must say thanks bunches for the recipe my hips aren't pleased but my taste buds are. And thanks Kay for sending me the email and attaching the copycat cookbook.

Wednesday, July 29, 2009

attack of the killer zucchini

yes, i know it's been a month since we last posted, but you know what it's like. anyhoo, my friend annaluisa and her husband, jerry, have a garden and they're growing, among other things, some great zucchini. annaluisa was kind enough to share some of their crop with me. check this thing out, it's ginormous

still life with zucchini

i love the flavor of grilled zucchini, so, i dusted off the chicken crematorium, i mean, the barbeque, and grilled me up some zucchini, with a side of london broil steak. i made some caramelized onions to go on top of the zucchini and it really brought out the sweetness of the zucchini. one thing i learned about caramelized onions: i do not have the kind of patience it takes to make them. this is probably no surprise to anyone that knows me. ahem. anyway, here's the final product -

london broil and zucchini with caramelized onions

thanks, annaluisa and jerry for sharing the bounty of your harvest!

Monday, June 29, 2009

Not your Grandma's pie


This pie is so versatile and tastes good too. Always looking for different recipes and anything that includes tortillas go to the top of the must try list.

Layers of roasted pork, fresh tomatoes, grated cheese. roasted green chiles, beans, and the ever popular cilantro.

Found this recipe over on Simply Recipes and Elise has never failed when it comes to Mexican food. She calls this comfort food and I can readily agree.

For the beans I used a can of pinto beans that I cooked in some tomatillo sauce I had on hand. Buttering the tortillas is also the key to crispiness.

I made two and shared one with friends, when the pie plate was returned I was asked if I was gonna make another one of these.


Thursday, June 18, 2009

How we do it: Green Chilies

There is really only one way to peel green chilies; roast them. I use a lot of the Anaheim long green chilies. The flavor is milder than say a jalapeno but it still has some bite and a terrific flavor.

Usually to roast them I rub a bit of oil on the skins and drop them on the BBQ grill while I'm cooking something else. You just turn them until they are equally charred on all sides and put them in a plastic bag. Their heat will cause them to steam a bit loosening the charred skin. When cooled the charred skin slips right off. Slice open one side and remove the seeds. I always snip off a piece to assess their hotness. If they are too hot for you remove the veins on the inside. That is where the heat is. Wear gloves if you are the least bit sensitive to the chili oil and whatever you do, don't touch your nose or eyes. That goes for any other chili you are handling.


When I only want one or two I turn on the gas burner and roast them there. It's quick and I love the smell in the kitchen of roasting chilies. Just remember to turn them carefully so all areas gets charred. Those odd shaped ones are difficult to keep on the burner so make sure to buy long straight ones at the market.

Cook them the same as above and remember when you are peeling off the skins and removing the seeds, don't do it under running water, it dilutes the flavor but do give them a quick rinse. I like to leave just a bit of the char on some of the chili to add some additional flavor.

We've posted a number of recipes with green chilies. Here are just a few.

Green Chili Quiche
Doodles Chili Verde

Friday, June 12, 2009

When in doubt

make two desserts I say. Recently hosted a small gathering for a dear friends birthday celebration. Small gathering meaning only about a dozen adults. Menu was going to be a BBQ of hot dogs , hamburgers, potato salad, baked beans and a broccolini salad I concocted. More about that later this is all about desserts.

Just realized sister moon and I have been doing a lot of desserts lately, must walk off those extra pounds next week.


So back to the two desserts one of which is red velvet cupcakes. I chose cupcakes because birthday sparkle candles look cute on cupcakes. The texture of the cupcakes are moist and delish. No fancy frosting just a buttercream that is my favorite. No need to post the recipe but here is the link to the original, which I might add is one of my very favorite sites for recipes. Know that Elise does not fail to come thru.

The second dessert is one I found over of P'Dub's blog. Pioneer Woman comes up with some fine concoctions and the desserts are usually butter laden. Pita apple crisp with a sweet cream sauce does not disappoint.

Click here for the recipe
. No I did not use the wheat germ or the apple brandy. And when Miss P'dub says proceed with caution she ain't kiddin'. Wonderful desert for a crowd. I made the sauce that she posted and also made my Mommas sauce she used to make for her apple dumplings. Trust me folks eith one will get ya huge praises.

Sauce for Apple Crisp

1 cup brown sugar
1 tablespoon flour
1 tablespoon cinnamon
1 tablespoon butter
2 tablespoon Karo syrup
1/2 cup apple sauce

Combine above ingredients, heat over medium heat till thickened, spoon warm sauce over apple crisp.

Might I tell you that the birthday girl took home the two cupcakes that were remaining and the husband of the guest of honor was quite disappointed there wasn't more apple crisp to take home...............guess everyone was happy. Glad I made two desserts.

Friday, June 05, 2009

Where the egg whites came from


Choux Pastry has always fascinated me. So light, so delicate and filled with all the wonderful things I like. So when I ended up with more Fat Free half and half than I could use in the next week I thought I'd give this recipe a try. It's from a lovely little book entitled, Vanilla. Yum. Though Yum isn't in the title, it should be.

First the Cremé Patissiére.
(I used all fat-free half and half for all the liquid)
2/3 cup milk
2/3 heavy cream
1 vanilla bean
4 egg yolks - room temperature
3 tablespoons sugar
2 tablespoons flour

Put milk and cream into a medium, heavy-bottom pan. Use the tip of a small sharp knife to score the vanilla bean lengthwise through the center. Add it to the pan and bring the milk to a boil. Remove from heat and let it infuse for 20 minutes.

Bean together the egg yolks, sugar, and flour until smooth. Remove the vanilla bean from the milk, scrap out the seeds with the tip of a knife, and return the seed to the milk. Pour the milk over the egg mixture, beating well.

Don't discard the bean, rinse and dry it and put it in a container with sugar. In a week you'll have the most delicisoso sugar.

Return the custard to the pan and cook over a gentle heat, stiffing constantly with a wooden spoon, for 4-5 minutes until it is thick and smooth. Turn the custard into a small bowl and cover with plastic wrap to prevent a skin from forming. Let cool before use.

Now for the Choux pastry.
1/2 cup flour
1/4 cup butter
2 eggs, beaten
1 teaspoon vanilla ( I love paste vanilla)

Lightly grease a large cookie sheet and sprinkle with water. Sift the flour onto a sheet of waxed paper. Cut the butter into pieces and melt in a medium pan with 2/3 cup water. Bring the mixture to a boil, then remove the pan from the heat.

Tip in the flour and beat until the mixture forms a ball that comes away from the side of the pan. I did this with a wooden spoon. Let cool for 2 minutes then gradually beat in the eggs until mixture is smooth and glossy. Add the vanilla.

Place 12 even-size spoonfuls of the mixture, space well apart, on the prepared cookie sheet and bake in a pre-heated 400 degree over for about 22-25 minutes until they are well risen and golden. Make a slit around the middle of each puff and return them to the oven for 3 more minutes to dry out the centers. Transfer to a cooling rack to cool.

Open each puff and fill with the pastry cream. I placed three banana slices on the bottom, then the cream and finally the top. Dust with confectioners' sugar and store them in a cool place until ready to serve.

They were tasty but my pastry cream was not set as much as I'd wanted so they were a bit difficult to eat, too runny. It was either I didn't cook it long enough or, as I suspect, the fat-free half and half. Next time, the hell with the calories, I'll use regular half and half.

You can be as creative as you want. I've made these with chicken salad for a luncheon buffet and
were very good. Just remember to assemble at the last minute so they puffs stay crispy.

Sunday, May 31, 2009

sashimi dinner


sashimi dinner
Originally uploaded by lornababy
we're lucky enough to live close to a couple of japanese markets. we were by the nijiya market on saturday and stopped in to pick up the fixin's for a nice sashimi dinner. tuna and salmon. simple, healthy and delicious.

Thursday, May 28, 2009

When life gives you egg whites, make meringues

I ended up this morning with four egg whites and I can't throw away four egg whites. Nope can't do it. I've tried, I've even froze them thinking I'd do something at a later date and since I already have frozen egg whites that are from the Clinton administration I figured I better use these. Don't try to understand me, just feel sorry for me.

Even though I've collected a dozen recipes for meringues I'd never made any of them. Oh, I've eaten my fair share. There is a lovely bakery in Westlake that make a coconut meringue cookie that is to die for but I've never tried until this morning when I ended up with four egg whites. How I ended up with four egg whites is another post that I will hopefully finish this weekend but you've seen my track record lately, don't get too excited.

Now, the most important thing about meringues is don't open the oven. Sheesh, what a test of my patience. My sister makes a wonderful roast prime rib that you cook for a while, turn the oven off, and let it rest for a few hours. Holy Cats. She had to tie the oven door shut so I wouldn't, you know, just check on it. So here I am with my cookies tucked neatly into their warm little beds and me on the outside tapping on the glass, Open, Open, Open ...

Here's the recipe I used. Could not be more simple, it's just the damn waiting.

Pecan Meringue cookies

Notes on working with egg whites. Before you start, remove eggs from refrigerator and let them come to room temperature. (A couple of hours will do, or if you are rushed for time, immerse them in warm water for 10 minutes.) Make sure that all bowls, hands, and utensils that might touch the eggs are clean and free from oils.


* 1 cup whole pecans (preferably lightly roasted - 8-10 min at 250°F)
* 3 egg whites
* Pinch salt
* 1 cup sugar
* 1 teaspoon vinegar

Preheat oven to 300°F.

Place pecans in zipper baggie and beat them with a wooden spoon to break into small pieces. Set aside.

Put egg whites into a stand mixer bowl. Add salt. Start the mixer speed on low, gradually increasing the speed until soft peaks start to become visible and the egg white bubbles are very small and uniform, about 2 to 3 minutes.

Increase the speed to medium-high, and slowly add the sugar to the egg whites. Continue to whip the eggs and sugar for a few minutes. Then add the vinegar to the bowl. Increase speed to high and whip the egg whites until they fluff up and become glossy, and stiff peaks form when the whisk is lifted, 4-5 minutes.

Using a rubber spatula, gently fold in the pecan pieces. Drop by teaspoons onto a cookie sheets that have been lined with parchment paper or Silpat. (I piped them from the same plastic bag the nuts were in after cutting off a corner)

Put the cookies sheet in the 300°F oven, close the door and turn the oven OFF. Leave them in the oven overnight. In the morning they should be ready - crisp on the outside, light and airy on the inside. If they are a little marshmallowy or chewy on the inside in the morning, just let them dry out for a few more hours. Makes 12-24 cookies, depending on the size.

Editors note: I did finally get the photos posted. It's not easy taking a snap of something white in something glass. Should be a photo assignment somewhere. The cookies are wonderful. Not too sweet and light and airy.

Monday, May 25, 2009

How we do it: Pie vents

This ever happen to you?
You finally get the pie crust right. You get the fruit in the pie shell and you even get a decent top crust on. Now into the oven it goes and 45 minutes later you have a drooly bubbly goo oozing out of your pie onto your clean oven making a smokey mess. I can't tell you the number of times I've had to remove the pie, toss salt on the gooey mess, make a little foil boat to catch the dripping mess and put the pie back to continue to bake.

What I found out, and from who I just can't remember, is use three pieces of uncooked penne pasta stuck in the crust before putting the pie in the oven can almost eliminate that above scenario. These little steam vents will turn crunch brown but relieve the pressure of you bubbling juices in your fruit pie. Don't forget to remove them and toss them away.


Yes, you can use those cute little ceramic birds to sit in the center but I found this is so easy and it only leaves little holes in the top crust, plus, it's nearly free unless you never use penne. Could that be? Is there someone out there who is planning to bake a pie and has never made penne pasta?

If you put a cookie sheet or something else under the pie it seems to interfere with the proper baking of the bottom crust. My mom always said, your bottom crust needs to be set before the filling bubbles or you'll get that under-done crust. She's right, you need all the heat focused on the bottom of the pie to get it right.

The pie? It's my all time favorite, Pineapple Pie. Check out the link for the recipe.

Monday, May 18, 2009

Chilaquiles: not just for breakfast anymore

As many cultural dishes do this recipe comes from the peasants side of the table. Usually they are fixed for breakfast from last nights tortillas and salsa. The poor of this planet have always been green.

Chilaquiles (chee lay kee lays) has so many variations but while tinkering about with this recipe I came up with great casserole version. Since I fry my tortillas in oil before assembling my enchiladas I thought I'd combine the two dishes.

Salsa Verda is a sauce of tomatillos, spices, and chillies and you can use homemade or buy it in the store. If you can find salt-free tortilla chips you could use them in a pinch but frying the tortillas isn't very difficult at all. That's the whole idea of using left over tortillas.

Chilaquiles Enchilada Style

1 quart Salsa Verde, homemade or store bought
vegetable oil for frying
12 corn tortillas
2 eggs, beaten
1/2 cup Jack cheese, shredded
2 tablespoons finely chopped green onion
2 tablespoons finely chopped fresh cilantro

In a large pan bring Salsa Verda to boil and turn down to a simmer until thickened a bit.

While that is simmering cut tortillas in wedges or strips and fry in small batches until golden. Remove to paper toweling to drain. Make sure oil is hot enough between batches so the chips don't become oily. Put chips in a very large bowl or pan; big enough to add the sauce and stir.

Return the salsa to a light bubble and whisk in quickly the beaten eggs. The sauce will start to thicken and continue to whisk for about 30 seconds. Pour the sauce over the chips tossing gently as not to break them. Toss until they become soft and absorb some of the sauce. Sprinkle with cheese, onion, and cilantro. Serve hot.

Now this is where I changed my recipe. After you turn off the heat and before you pour the sauce on the chips gently stir in the following:

2 large cooked chicken breasts, cubed
2 green chillies, chopped
1 cup Pepper Jack cheese, cubed
2 green onions; including tops, chopped

Now pour over chips and gently mix. This goes in a 2-3 quart oven-proof dish and into a 375 oven until bubbly. Remove from oven and sprinkle with the cheese, onion, and cilantro. To serve, use a large spoon.
This photo is before the oven and because it was so yummy, no photo after. I was going away for the weekend so I made the whole recipe, took out three portions, and gave the remaining to our neighbors. I hate to waste anything.

This is great to use leftovers and you can add anything you'd normally put in your enchiladas. Olives, medium cheddar cheese, salsa, and you could certainly leave out the meat if you wanted. The eggs you whip into the sauce makes it very rich and velvety.

Friday, May 01, 2009

An actual Vegan Recipe

This might be the only Vegan recipe you'll ever find on PBE but I had to share this.

Last week I attended the LA Times Festival of Books at UCLA. This is my third year and it is always a good day though last year they didn't have any decent authors on the Food Stage. I was very lucky to be there and see a good demo from two authors. Amelia Saltsman author of the Santa Monica Farmer's Market Cookbook was half of one of the cooking demos on Saturday. The other was, Jo Ann Cianciulli , and her book is LA's Original Farmer's Market Cookbook .

Amelia was focused on all farmer's markets and the wonderful fresh local food to by and Jo Ann was more about one the 3rd and Fairfax Original Farmer's Market. I bought her book and even stood in line to have her sign it for me. Something I usually don't bother with but she was so charming I had to ask a few questions.

What I found at the demo was Green Garlic. I know, I'm always a bit late to the party and lil bird had mentioned buy some at her FM a few years ago but I was so intrigued with a very simple vegetarian soup Amelia made I had to find some. Quite surprisingly I found some at Jon's our local ethnic market. It looks very much like Mexican Onions but not. It's actually garlic not formed into a head of cloves with the green tops. Everything is eatable and has a mild garlic flavor. I made the soup and as vegetarian recipes go it wasn't bad and it's very quick to make. Next time I'll saute the leeks and green garlic with bacon to give it a little more flavor; maybe a little cream, too.

Vegan Potato Leek and Green Garlic Soup
  • about two cups of leeks, white and just a bit of the green part
  • three bulbs of green garlic, remove the roots and chop
  • about two cups of cubed red potatoes, don't peel
Saute leeks and garlic in a large sauce pan in oil. Add potatoes. Just cover vegetables with water and simmer, not boil. Add a little salt and pepper to taste. Simmer until potatoes are done. You may need to adjust the seasoning. Serve.

Now she suggested to puree some of the soup to give it a different texture which I did. I just did a quick few whirs with my stick blender. The flavors are very subtle and I'm sure that's why there is no chicken broth and it's quick, less than 30 minutes and with no milk or meat you could serve this to you Vegan friends. My meat-eating husband ate it for lunch and enjoyed it quite a bit.

The book I bought, LA's Original Farmer's Market Cookbook is great and brought back some fond memories. Little vignettes about the origins of the Farmer's Market and great recipes from some of the food vendors. If you've never been or a regular patron this book is great.

Saturday, April 25, 2009

I found my meatball


I have found many recipes on Simply Recipes that I have kept in my library of favorites. But this one for her meatballs is just the best..............and when my sweet husband raves about a new recipe I know I have a winner.

The addition of ricotta cheese makes for a great taste in my humble opinion. And yes I did add freshly grated parmesan cheese once plated. But lately I have been so bad about taking any photos while cooking I just jumped the gun a bit. I opened a new bottle of wine from a local vineyard we just happened to visit here in Arizona. Beautiful winery and if you like dark red wines you would like this CABERNET SAUVINGNON


Back to the recipe if y'all like meatballs I think you might like this recipe. The recipe makes a bunch so we will be having meatball subs for lunch and the rest I froze.

Monday, April 20, 2009

Is this decadent...............


photo from the food network site cause mine turned out horrible

oh my you betcha it is chocolate over the top decadent, evil and a tad wicked.

Flipping channels awhile back and I heard Giada DeLaurentiis say something to the effect of "be right back with my chocolate honey almond tart". Put the brakes on the remote cause I could wait for that. Now you must like chocolate to be able to handle this decadency. I'll be real honest, this dessert I can only handle in small portions.

Make it and you decide..............

Chocolate Honey Almond Tart

Recipe courtesy Giada De Laurentiis, 2008

Prep Time:
10 min
Inactive Prep Time:
5 hr 20 min
Cook Time:
12 min
Serves: 6 to 8 servings

Ingredients
  • 1/2 stick (2 ounces) unsalted butter, cut into 1/2-inch pieces, at room temperature, plus extra for coating the pan
  • 9 chocolate graham crackers, 5 1/2-ounces total
  • 2 tablespoons slivered almonds
  • 3/4 cup heavy cream
  • 1/4 cup honey
  • 12 ounces semisweet chocolate chips

Directions

Preheat the oven to 350 degrees F.

Butter the bottom and sides of a 9-inch springform pan.

Place the graham crackers and almonds in the bowl of a food processor. Process until the mixture forms fine crumbs, about 15 to 20 seconds. Add the butter and pulse until incorporated. Press the crumb mixture into the bottom of the prepared pan. Bake for 12 minutes. Cool to room temperature, about 20 minutes.

In a small saucepan, whisk the cream and honey together over low heat until the honey has dissolved. Increase the heat to medium and bring the mixture to just below a boil. Place the chocolate chips in a medium bowl. Pour the hot cream over the chocolate and stir until the mixture is smooth. Pour the chocolate filling over the prepared crust. Refrigerate for at least 5 hours or preferably overnight.

Loosen the tart from the sides of the pan by running a thin metal spatula around the edge. Unmold the tart and transfer to a serving plate. Cut into wedges and serve.

Friday, April 17, 2009

Being Green; still

To me, "being green" can mean a variety of things. Saving energy or using something I'd have just thrown away and, more often than not in this unstable economy, saving money.

Here is a dessert I prepared recently that hit all those high notes. I was using the gas BBQ and I needed to get it very hot and use all three of the burners so instead of letting that heat go to waste I prepared a skillet full of sliced apples with white and brown sugar, a pinch of salt, cinnamon and about a half stick of butter. For the topping I crushed three homemade biscuits from breakfast. I don't like them reheated and made too many for me and my beloved so this was an alternative tossing them in the trash.

After I'd pulled my dinner from the BBQ I put the skillet, covered with foil, on the grill, turned off the center burner and reduced the heat to 325/350 and closed the lid. After dinner, about 30 minutes I removed the foil and tested the apples. That was enough time to cook them and caramelize the sugars. I set them on a board to cool and when we were ready for dessert just spooned the apples into a bowl.

Really any recipe you have for baked apples or an apple crisp should work but using the biscuits was great. The real work for the grill is the preheating so that was already taken care of cooking our dinner. Plus it cooked while we were eating, no fuss.

Sometimes being green is just taking the time to think about how you are cooking.

Share your ideas with us, won't you?

Friday, April 03, 2009

Bite the cookie

Sometimes I become obsessed with food and make and remake recipes until I like them. Cookies are on the Hit Parade right now so bear with me, folks.

I adore cookies, all types, flavors, and sizes. If I'm thumbing through a magazine cookie photos will make me stop, asses the recipe, and tear it out for later. I've piles of snippets stuck in the back of my cook book. Someday I'll organize them, ha!

Let me sing the praises of the cookie. Easily stored in a variety of containers, put in a slice of bread alongside cookies you want to stay soft, you don't need a fancy jar though I enjoy my crock. You don't need a plate or a fork or any fussy presentation; hands work great. It's portable, you can walk by the cookie jar, on your way to the gym, and snag one or three. They are a favorite of all ages, cultures, and cooks. I bet your family has its favorite and it's time you made them some right now.

Here is my latest Vanilla Pecan Refrigerator Cookies. I can't say where I got this recipe but I do enjoy having a log of refrigerator cookies in the freezer. I can bake the entire recipe or maybe just a dozen for my beloved and me. He likes them, too. Though shortbread cookies are my all-time favorite these little gems are easy, quick and delicious. I've been going for more of a crispy cookie lately and, since there is only white sugar, they fill that order. I used butter but if you use shortening they might be a bit crispier; I'll try that next time.

Vanilla Pecan Refrigerator Cookies

1 cup unsalted butter or shortening
2 cups sugar
2 eggs
2 tablespoons vanilla (yes, this is correct)
3 cups flour
1 teaspoon baking soda
1 teaspoon salt
1 cup chopped pecans (nice if you toast them)

Cream the butter and sugar until fluffy. Add eggs one at a time and beat well after each. Add the vanilla. Combine the flour, baking soda and salt in a separate bowl. Use a spoon to stir in the flour mixture into the sugar mixture. Add the pecans, mixing well. Shape into three rolls about 2 inches in diameter and wrap in was paper. refrigerate at least two hours or up to three days. You can also freeze.

Bake in 375 oven. Cut the dough into 1/4 inch slices 2 inches apart on cookie sheet. Bake about 10 minutes until lightly browned. Cool on wire rack and store in airtight container. Makes about 6 dozen.

Editor's note: My husband usually can take or leave cookies, I know, why would I marry someone like that? With these he can't keep out of the cookie crock. It has quite a heavy lid so I can always tell when he's in there. I asked what he liked about them and he couldn't put his finger on the reason. Finally, who needs a reason to eat a cookie!

Let us know your family favorite cookie.

Monday, March 30, 2009

Cast Iron Potluck a big success

Here's an update on my earlier post, Cast Iron Pie. I made the changes I mentioned in the recipe and it was very well received.

We all had fun talking with one another, sharing recipes and techniques, and then sitting down to eat. My Apple Pie wasn't as pretty as the early post but was very tasty. I'll make that again.

Tuesday, March 24, 2009

Plain but perfect

There are as many sugar cookie recipes as there are families. For roll out cookies I'd made the same recipe over and over until I found Sylvie's on Soul Fusion Kitchen. Perfect for cookie cutters but growing up I remember a plain sugar cookie with the tops dusted with sugar. As luck would have it I found a recipe to satisfy that old memory.

While celebrating Christmas at Mary's, my step-mother, I found some cookies she'd baked but didn't have out. She said they were a little stale. They were exactly what I was looking for, well not the stale part, but I asked her to send the recipe and now I make these regularly. I only make a half recipe because my darling and I would sit down and eat them all and four to five dozen is way too many.

They are dusted cinnamon and sugar and are made with butter and oil and couldn't be easier to throw together. I hope you enjoy them.

Sugar Cookies
1 cup powdered sugar
1 cup white sugar
1 cup margarine (I used unsalted butter)
1 cup cooking oil

Cream together – beat until fluffy.

Beat in 2 eggs

4 cups plus 4 tablespoons
1/2 teaspoon table salt
1 teaspoon baking soda
1 teaspoon cream of tarter
1 teaspoon vanilla

Preheat oven to 350 degrees. Drop by rounded teaspoonfuls onto a greased cookie sheet. In a small bowl, combine some sugar and cinnamon. Using the bottom of a drinking glass, spread with margarine, dip it into the sugar and cinnamon mixture, and press on top of each cookie. Cook for about 10-15 minutes.

Friday, March 20, 2009

Happy find


I don't often do product review/rave but I am doing one here about Panko I use panko a lot in a variety of ways. I just found this new product at my local Safeway/Von's and I'm sure maybe your local market. Go take a look at the web site and see some recipes ideas. If you try it email me and let me know how you like it please. Oh I just used it as a topping for mac & cheese makes for a nice crunchy top.

Wednesday, March 18, 2009

Cast Iron Apple Pie

Since I'm planning to participate in a Outdoor Dutch Oven demo when we go camping the end of the month I though I'd better try out this new recipe before I did. I saw this recipe on America’s Test Kitchen (www.americastestkitchen.com) on public television's Beg Week and thought I could convert it to iron. I followed the recipe as stated and the product was, ok. I hate, just ok so when I do this again I'll make some adjustments. There are also adjustments to using an Outdoor Dutch Oven.

The sauce had little flavor and was not thick enough. They use cornstarch and I'm not a fan of that to thicken pies so I'd use flour next time. Also, you need to adjust the thickening agent for the different apples. Some, more juicy that others, will take more flour. Now cinnamon is not to everyone's taste but an 1/8 of a teaspoon, who could even taste that. I'll add more. I've made my suggestions in red for the changes to the recipe and green for the adaptation to cast iron.

For the camping trip, I'll pre-make the pie dough and slice the apples and sprinkle with lemon juice to keep them from getting brown.

Skillet Apple Pie
from the Episode: Easy Apple Desserts

If your skillet is not heatproof, precook the apples and stir in the cider mixture as instructed, then transfer the apples to a 13- by 9-inch baking dish. Roll out the dough to a 13- by 9-inch rectangle and bake it as instructed. If you do not have apple cider, reduced apple juice may be used as a substitute—simmer 1 cup apple juice in a small saucepan over medium heat until reduced to 1/2 cup (about 10 minutes). Serve the pie warm or at room temperature with vanilla ice cream or whipped cream. Use a combination of sweet, crisp apples such as Golden Delicious and firm, tart apples such as Cortland or Empire.

Serves 6 to 8

Crust
1 cup unbleached all-purpose flour (5 ounces), plus more for dusting work surface
1 tablespoon sugar
1/2 teaspoon table salt
2 tablespoons vegetable shortening , chilled
6 tablespoons (3/4 stick) cold unsalted butter , cut into 1/4-inch pieces
3–4 tablespoons ice water

Filling
1/2 cup apple cider (see note)
1/3 cup maple syrup
2 tablespoons fresh lemon juice from 1 lemon
2 teaspoons cornstarch (I'll use 4 tablespoons flour)
1/8 teaspoon ground cinnamon (I'll use 1-2 teaspoons)
2 tablespoons unsalted butter (I'll use 3 tablespoons)
(I'll use 3 tablespoons brown sugar)
2 1/2 pounds sweet apples and tart apples (about 5 medium), peeled, cored, halved, and cut into 1/2-inch-thick wedges

1 egg white , lightly beaten
2 teaspoons sugar

Use a 12 inch deep outdoor dutch oven. Pre-heat with 25 coals underneath, lid on, until pan is hot.

1. FOR THE CRUST: Pulse flour, sugar, and salt in food processor until combined. Add shortening and process until mixture has texture of coarse sand, about ten 1-second pulses. Scatter butter pieces over flour mixture and process until mixture is pale yellow and resembles coarse crumbs, with butter bits no larger than small peas, about ten 1-second pulses. Transfer mixture to medium bowl.

2. Sprinkle 3 tablespoons ice water over mixture. With blade of rubber spatula, use folding motion to mix. Press down on dough with broad side of spatula until dough sticks together, adding up to 1 tablespoon more ice water if dough does not come together. Turn dough out onto sheet of plastic wrap and flatten into 4-inch disk. Wrap dough and refrigerate 30 minutes, or up to 2 days, before rolling out. (If dough is refrigerated longer than 1 hour, let stand at room temperature until malleable.)

3. FOR THE FILLING: Adjust oven rack to upper-middle position (between 7 and 9 inches from heating element) and heat oven to 500 degrees. Whisk cider, syrup, lemon juice, cornstarch, and cinnamon (if using) together in medium bowl until smooth. Heat butter in 12-inch heatproof skillet over medium-high heat. When foaming subsides, add apples and cook, stirring 2 or 3 times until apples begin to caramelize, about 5 minutes. (Do not fully cook apples.) Remove pan from heat, add cider mixture, and gently stir until apples are well coated. Set aside to cool slightly.

For DO: Add butter, then apples to the preheated DO. Stir and cook until apples begin to caramelize. Remove DO from coals add cider mixture stirring to coat the apples. Dust in more flour, if needed.
4. TO ASSEMBLE AND BAKE: Roll out dough on lightly floured work surface, or between 2 large sheets of plastic wrap, to 11-inch circle. Roll dough loosely around rolling pin and unroll over apple filling. Brush dough with egg white and sprinkle with sugar. With sharp knife, gently cut dough into 6 pieces by making 1 vertical cut followed by 2 evenly spaced horizontal cuts (perpendicular to first cut). Bake until apples are tender and crust is a deep golden brown, about 20 minutes. Let cool 15 minutes; serve.

For DO: After you cut the pie dough, place 4 coals on the bottom and remaining on the lid. Most of the heat should be towards the outside with a few in the center. You can see I had not enough on the rim. Turn lid every five minutes 1/4 turn and bake until crust is golden brown. I needed 25 minutes. Resist opening the lid until 20 minutes have passed.

This will be quite hot but it needs to be dished up since the DO hold onto that heat for a long time. I spooned it into bowls.

If you are camping and prep this before hand it is a great dessert. I might even try this in my regular home oven.

Saturday, March 07, 2009

bad yet remarkably neat dog


bad yet remarkably neat dog
Originally uploaded by lornababy
i forgetfully left an open box of cheez-its within dog reach. when i got home from work, the dogs had gotten into the box. if you look in the bottom left of the corner of the photo, you can see that they pulled the inner bag out of the box, then completely emptied the bag into a neat pile. i like to imagine them running back and forth to the cheez-it pile all day long to take one cheez-it at a time. however, it's more likely that this had just happened right before i got home and i caught them in the act.

fwiw, they didn't get in trouble for this, it was my fault for leaving the box within their reach. i made max sit by the cheez-it pile for the photo. i was just lucky i caught him licking his lips when i snapped the pic.

Friday, March 06, 2009

Spring time asparagus

if you are an asparagus lover this is just the best time.
We are big time asparagus fans and have it quite often in a variety of ways................one of which is the omelet I made recently.


saute up a bit of the tender, fresh asparagus............I like my asparagus a bit crunchy and definitely not mushy.


add the sauted asparagus and some of your favorite cheese that you shredded not that already shredded dry stuff you buy in the market, add that to your eggs and VOILA!!!

Asparagus Omelet