Pommes frites are just french fries – but since I don’t make them like traditional french fries I like to differentiate them so I can keep the recipes separate. Not only that but by using the term pommes frites I tend to think of them in a slightly better frame of mind, foodie wise, than french fries (which seem so McDonald’s like to me). Don't get me wrong I'm a big fan of McDonald fries.
This is a twist on a very classic worldwide pairing – mayo (or even mayo and ketchup mixed together) with fries is VERY traditional, its not overly common here in the USA however. So try it next time if you haven’t yet. .
In parts of Utah, Nevada and the Northwest USA there is a popular sauce usually called fry sauce'
Fry Sauce Ingredients
1/4 cup mayonnaise
1/4 cup ketchup
1/8 teaspoon cayenne pepper
1/4 teaspoon onion powder
salt & pepper to taste
Mix ingredients till well blended.
Instead of cayenne pepper I have used a product I found when driving thru Oklahoma awhile back called Slap ya Mama. Nicely spiced, white pepper blend which is marked as a Cajun seasoning. It is made by Walker & Sons from Ville Platte, Lousiana.
I also have used less ketchup and added a good BBQ sauce.
Now to the pommes frites
I try to always use russet potatoes as they produce the best fried fry. Anything else doesn’t get as crispy or dehydrates leaving only a shell behind. The only exception would be sweet potatoes, which make fantastic fries in my opinion.
Directions
Preheat the oven to 450 degrees F.
Peel potatoes and cut lengthwise into quarter-inch thick slices. Cut again into 1/4-inch thick fries. Place the potatoes into a bowl with cold water; this will help keep the fries crisp. Just before cooking, drain water and place on paper towel, pat dry.
Put the potatoes in a bowl; add canola oil, 1 tablespoon salt, 1/2 teaspoon black pepper. Toss well and lay out in 1 layer on nonstick baking sheet. Bake until light brown. Cook for approximately 30 to 40 minutes, turning frequently until golden brown.
Remove from oven, allow to cool for 1 or 2 minutes and serve with some of that sauce you made while cooking your poomes frites.
Sunday, August 29, 2010


Monday, August 09, 2010
Steam driven cookies
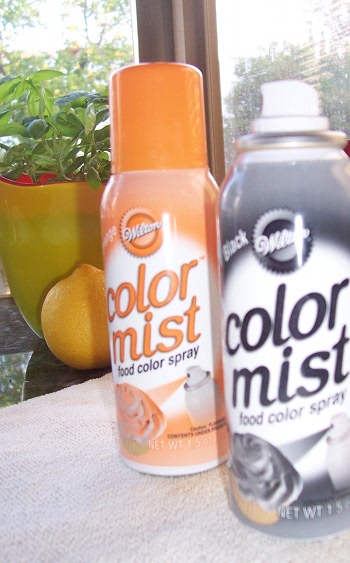
Gear driven machines are at the heart of it all so my submission for the dessert table is all decked out appropriately. This post is more of a product review than anything else because these are just plain, rollout and iced sugar cookies. I knew what I wanted to do and talked to PBE's resident chef Teri, she had the solution, Wilton's Color Mist, a spray on editable color. I made my own stencils out of heavy cardstock and iced the cookies with royal icing to give a smooth base. Then laying the stencil over the cookie and gently spraying gave me the look I was going for. I played with different layers of color. Of course you can use this spray on any dessert and a quick spray would dress up plain white cake or cupcakes.
Things to know:
- Practice spraying first on something you can wash off
- Give yourself lots of space because there will be overspray
- Shake often, really shake a lot
- Spray in a sweeping motion so as not to "puddle" the color
- Let dry at least an hour before stacking or adding another color
 And, if you lived in the Victorian-era and played guitar, this might be what an electric one looked like. Google for more creative examples of this fantasy world "Steampunk".
Thursday, July 22, 2010
Ragu: Italian gravy
Editors note: this, seemingly, is the longest recipe I've ever posted but I guarantee if you make this your family/friends will sing your praises for a long, long time.
Ragu alla Contadina (country style ragu)
If you cook up a package of lasagna noodles and gently warm the bechamel and ragu, if needed, you can layer all of this, along with a cup of Parmesan cheese, into a 13 x 9 pan, ending with the beschamel and bake for about 40 minutes, covered. Uncover and brown the top for about another 10 min. Let rest for about 10 minutes it will be so much easier to cut.
You're gonna cry when your family or guests gobble this up in what seems like a minute because only you know how damn long it took to make. Just be happy you were smart enough to freeze a batch for the next meal. You did make a double batch, right?
Because I'm making ragu today I tried to remember when I posted the recipe on PBE. Come to find out, I didn't. This is from a recipe I found on Laura Rebecca's Kitchen. She was participating in a challenge from Darling Bakers and I'm not sure who had the original recipe. It is Lasagna Verdi al Forno.
It was delicious the first time I made it but way too much work so next time I used store-bought lasagna noodles and it still took forever but the ragu is what I loved so, in honor of my darling companion coming back from a short, but grueling road trip to fetch our trailer from New Mexico, I decided to spend the morning cooking up a double batch and have his partner in crime for this three-day adventure, his lovely wife and the Princess and her court, over for some splendid Italian Gravy.
My mom, an excellent cook in her own right, had met an Italian woman and they became fast friends. Reason being, they both loved to cook and sometimes I think they tried to out-cook each other but being on the receiving end of these culinary wars was a good thing. Poking through my mom's refrigerator on day for something to eat for lunch I ran across a dish of pasta with sauce. It didn't seem to have much tomato sauce but was heavy in the meat department and asked it I could have some. Momma called it Pasta and Gravy and it was the best damn ragu sauce I'd ever tasted. It wasn't until I made the ragu from the Daring Bakers had I ever even come close.
So, pick a morning, at least four hours, and make a double batch because it freezes so very nicely and you are going to want more of this gravy.
Ragu alla Contadina (country style ragu)
This recipe doubles nicely
3 tablespoons extra virgin olive oil
2 ounces pancetta, finely chopped
2 medium onion, diced
4 ounces pork loin
4 ounces mild Italian sausage
8 ounces beef skirt steak, hanging tender, or boneless chuck blade or chuck center cut (in order of preference)
2/3 cup dry red wine or broth
1 &1/2 cups chicken or beef stock (homemade if possible)
2 cups milk
3 canned plum tomatoes, drained
Salt and freshly ground black pepper to tasteIn a very large skillet saute the pancetta and onions stirring frequently about 10 minutes, or so, until the onions barely begin to color. Coarsely grind all the meats together in a food processor or meat grinder. Stir into the skillet and slowly brown over medium heat. This takes a while because, first, the means will give off a liquid and turn dull grey but, as the liquid evaporates, browning will begin. Stir often with wooden spatula. Protect that nice crust forming on the bottom of the pan you'll use that later. Cook until the meat is a deep brown. Pour the meat into a very large sauce pan.De-glaze the skillet with some dry red wine scrapping until you loosen the lovely bottom bits. Pour in the sauce pan with the meat.Stir 1/2 cup stock into sauce pan and let it bubble slowly until totally evaporated. Repeat with another 1/2 cup stock. Stir the last 1/2 cup stock along with milk and adjust heat so the liquid bubbles very slowly. Partially cover the pan and cook 1 hour. Stir frequently to check for sticking.Add the tomatoes, crushing them as they into the pan. Cook uncovered, very slow bubble, for another 45 minutes or until the sauce resembles a thick, meat stew. I've never had to add salt and pepper but now would be the time so give it a good taste.Now your done with the ragu. Let's whip up a bechamel sauce. This is easy, very easy.
2 ounces pancetta, finely chopped
2 medium onion, diced
4 ounces pork loin
4 ounces mild Italian sausage
8 ounces beef skirt steak, hanging tender, or boneless chuck blade or chuck center cut (in order of preference)
2/3 cup dry red wine or broth
1 &1/2 cups chicken or beef stock (homemade if possible)
2 cups milk
3 canned plum tomatoes, drained
Salt and freshly ground black pepper to tasteIn a very large skillet saute the pancetta and onions stirring frequently about 10 minutes, or so, until the onions barely begin to color. Coarsely grind all the meats together in a food processor or meat grinder. Stir into the skillet and slowly brown over medium heat. This takes a while because, first, the means will give off a liquid and turn dull grey but, as the liquid evaporates, browning will begin. Stir often with wooden spatula. Protect that nice crust forming on the bottom of the pan you'll use that later. Cook until the meat is a deep brown. Pour the meat into a very large sauce pan.De-glaze the skillet with some dry red wine scrapping until you loosen the lovely bottom bits. Pour in the sauce pan with the meat.Stir 1/2 cup stock into sauce pan and let it bubble slowly until totally evaporated. Repeat with another 1/2 cup stock. Stir the last 1/2 cup stock along with milk and adjust heat so the liquid bubbles very slowly. Partially cover the pan and cook 1 hour. Stir frequently to check for sticking.Add the tomatoes, crushing them as they into the pan. Cook uncovered, very slow bubble, for another 45 minutes or until the sauce resembles a thick, meat stew. I've never had to add salt and pepper but now would be the time so give it a good taste.Now your done with the ragu. Let's whip up a bechamel sauce. This is easy, very easy.
Bechamel
4 tablespoons unsalted butter
4 tablespoons all purpose unbleached flour
2&2/3 cups milk
Salt and freshly ground pepper to taste
Freshly grated nutmeg to taste
Using a medium-sized saucepan, melt the butter over low to medium heat. Sift over the flour, whisk until smooth, and then stir (without stopping) for about 3 minutes. Whisk in the milk a little at a time and keep the mixture smooth. Bring to a slow simmer, and stir 3 to 4 minutes, or until the sauce thickens. Cook, stirring, for about 5 minutes, until the sauce thickens. Season with salt, pepper, and a hint of nutmeg.
4 tablespoons unsalted butter
4 tablespoons all purpose unbleached flour
2&2/3 cups milk
Salt and freshly ground pepper to taste
Freshly grated nutmeg to taste
Using a medium-sized saucepan, melt the butter over low to medium heat. Sift over the flour, whisk until smooth, and then stir (without stopping) for about 3 minutes. Whisk in the milk a little at a time and keep the mixture smooth. Bring to a slow simmer, and stir 3 to 4 minutes, or until the sauce thickens. Cook, stirring, for about 5 minutes, until the sauce thickens. Season with salt, pepper, and a hint of nutmeg.
If you cook up a package of lasagna noodles and gently warm the bechamel and ragu, if needed, you can layer all of this, along with a cup of Parmesan cheese, into a 13 x 9 pan, ending with the beschamel and bake for about 40 minutes, covered. Uncover and brown the top for about another 10 min. Let rest for about 10 minutes it will be so much easier to cut.
Sunday, July 11, 2010
Gooey Butter Cake
 Those three words just say it ALL!!
Sure wish I would have taken a photo of the cut piece with the homemade banana nut ice cream on top. I know good lord I'll have to walk an extra mile of three.
I have heard of this cake but had never, until last nite, had the pleasure of an up close and personal meeting with this tasty treat.
A small gathering of friends got together to say our farewell and best wishes for a wonderful couple that for med reasons must go home for the summer.
One of the gals that works here put the function together and brought this cake while her dear husband made the ice cream. There weren't many of us but the company was enjoyed as well as the desserts.
Try googling gooey butter cake and see the many, many items that come up. Well it seems that when you Google the cake and put in the word butter guess whose name comes up...............Paula Deen = butter. In spite of the Deen connection I did like the cake a LOT!!! But my thighs are in pain!!
Thursday, July 08, 2010
I found a winner
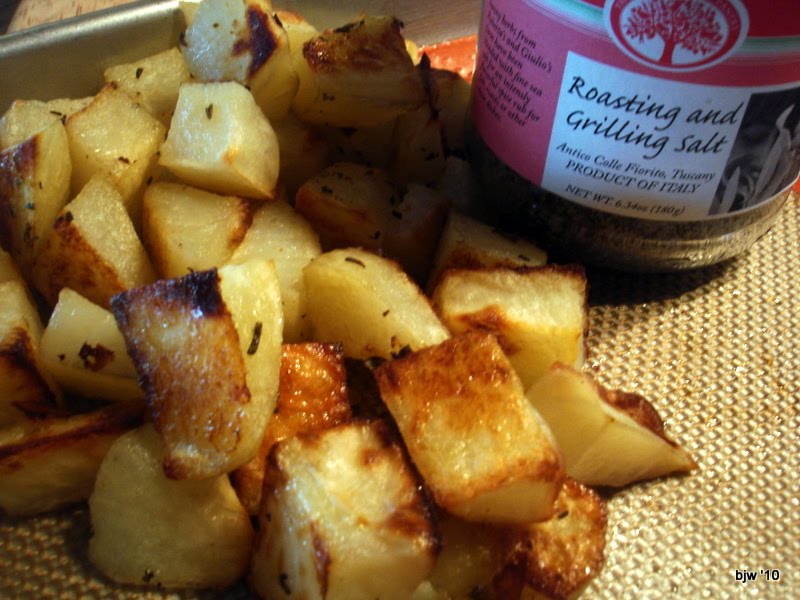
Well actually I was the recipient of winning this product.
Paula over at http://www.bellalimento.com
had a giveaway recently and I was the lucky recipient of these two items. The roasting and grilling salt is wonderful. The other item is a sun dried tomato spread that I have yet to use.
The above photo is of some roasted spuds drizzled with a bit of olive oil sprinkle some of the grilling salt and roast in a not (425*) for about 20~25 mins.
Find the grilling salt and their other products here
Wednesday, June 02, 2010
lemon, lemon, lemon

I like lemon just about everything, well with the exception of lemon Jello not so much!!
The following recipe was delivered to my facebook page. We have a birthday celebration function in a couple a days and the celebrant loves lemon, so these will be perfect I'm hoping. And this is easy cause you use prepared mixes. I know for all you bakers you are just shuddering, but sometimes ya just have to cut corners to save time.
Lemon filled sugar cookies
1 pouch of Betty Crocker sugar cookie mix
1/2 cup whole almonds, peeled
6 tablespoons butter or margarine, melted
1 jar of lemon curd (surprise I have a jar I made )
2/3 cup canned whipped fluffy white frosting (yes canned)
1/2 cup cool whip type stuff
1 teaspoon grated lemon peel
1 tablespoon sliced almonds
- Heat oven to 375* Spray 36 mini muffin cups with a light cooking spray
- In a large bowl stir cookie mix, ground almonds, butter and cream cheese until a soft dough forms.
- Shape dough into 36 ( 1 1/4 inch) balls. Press each ball in the bottom and up the side of the muffin up. Careful because the dough does puff up some.
- Bake 12 to 15 minutes or until golden brown. Keep an eye on these cause they do brown easily. Cool completely in pan, about 30 minutes.
- Remove cookies cups from pan, fill each cup with about 1 1/2 teaspoon of the lemon curd.
- In a small bowl mix frosting and whipped topping until blended well. Spoon a teaspoon of the frosting mixture on top of the cookie cup. Top each with lemon peel and sliced almond. Store covered in refrigerator.
Tuesday, April 20, 2010
Hey Mambo, you mixed up Sicialiano

Another great, easy and meatless pasta dish, this time from America's Test Kitchen. It couldn't be easier and a wonderful light main course or starter. Most Pestos are heavy with the oil, garlic and basil and this hits all those notes, just softer. Hot or cold it does well.
Sicilian Pesto Pasta
1/4 cup blanched slivered almonds, toasted
2 1/2 cups cherry tomatoes
1/2 cup basil leaves plus a few for garnish
small clove of garlic
pinch of red pepper flakes
1 peperoncini, chopped
Throw all of the above in a food processor and blend until everything is chopped. While running, add 1/3 cup of olive oil and blend. Then stir in 1/2 cup grated Parmesan cheese. Season with salt and pepper.
Cook 1 pound of spaghetti or linguine pasta in salted water and reserve a cup of cooking water.
Toss the pesto with the hot pasta using a little of the cooking water if it is too thick. Serve with a few chopped basil leaves and more cheese.
 This is one of my new pasta bowls; I love them. Tell me why I didn't buy more? This is good hot but I served it cold the next day and just as yummy. I let it come to room temp before serving.
Wednesday, April 14, 2010
You say catsup..........I say ketchup
 |
| the cast of characters |
either way you spell or say it you know you can make your own. Why would anyone want to do that you say.......one word TASTE.
1 6 oz. can of tomato paste
1/2 cup of vinegar I used apple cider & rice wine
1/2 cup of sweetener I used brown sugar
1 teaspoon salt unless your paste has a hefty amount of sodium already
1/4 teaspoon garlic powder
1/4 teaspoon onion powder
1/4 teaspoon cumin
1 1/4 cups water I started out with 1 cup
optional seasonings***
Combine all the ingredients, except for the optional seasonings, in a saucepan. Bring to a boil over medium heat, and then reduce the heat to low.
Simmer the mixture gently, stirring frequently, for approximately thirty minutes, or until it thickens to the consistency of ketchup.
Taste and adjust the seasoning to balance out the flavors, adding a bit more of any of the flavor components according to your preferences. Add one or more of the optional seasonings, if desired.
Continue cooking for two to three more minutes to allow the flavors to meld. Let the ketchup cool.
 |
| there it is 24 oz of pure ketchup |
Store ketchup in a covered container in the refrigerator. Unless you have some preservatives hanging around in your pantry this will only keep no more than a month I'm thinking.
***Optional seasonings would be to your pleasure. Spice it up with cayenne pepper, a smokey paprika, even some Middle Eastern spices.
So when we are having that yummy grilled buffalo burger in a few weeks my, my ketchup is gonna taste great.
Thursday, April 08, 2010
Cast Iron Beef and Noodles
Yes, I know, I'm like a one string banjo when it comes to cooking outside but I've truly come to love this. It might be that old pioneer coming out. I mean, we did come to Simi Valley in the '70s when there wasn't much here but a few housing tracks. That's a bit of a stretch because they did have a drive-in theater. Who can say why but I love to cook and this is an extension of that love.
So, rather than bore you with the instructions I'll add a new recipe I've found for noodles. I usually make them with all-purpose flour but picked up a package of Bob's Red Mill at Whole Paycheck. Their product is worth the extra cost and thought I give their recipe a try. I've always been a fan of home made noodles bu this makes such a wonderful textured noodle I think I'm hooked.
I like to use a little all-purpose flour with the semolina and I use my food processor to do the kneading. I'm not lazy, just … well, I am lazy. Do what you want. I will use a pasta machine to roll out and cut the noodles but try doing it yourself. There's nothing like hand cut to show that they didn't come from a package. Plus they are always a bit chewier when they are hand rolled and cut.
 Here is the cast of characters:
Celery, onions, and carrots; cut into small pieces
3 cups of beef broth
2 cup of chicken broth
about 2 cups of shredded beef
Saute the veggies in a bit of oil and add the broth and meat. Bring to a simmer and cook until the veggies are soft. Throw in the noodles fresh made noodles. If you use packaged or dried noodles you'll need some additional broth or water as they'll soak up that broth like a thirsty sailor.

Slowly simmer until the noodles are tender. Try not to stir too vigorously or the noodles will fall apart. When you use the home made noodles your broth will thicken a bit from the extra flour on the noodles. If not add a little roux and cook until thickened. I think these types of dishes are better the next day but after working this hard, it's usually right to the table.
So, rather than bore you with the instructions I'll add a new recipe I've found for noodles. I usually make them with all-purpose flour but picked up a package of Bob's Red Mill at Whole Paycheck. Their product is worth the extra cost and thought I give their recipe a try. I've always been a fan of home made noodles bu this makes such a wonderful textured noodle I think I'm hooked.
I like to use a little all-purpose flour with the semolina and I use my food processor to do the kneading. I'm not lazy, just … well, I am lazy. Do what you want. I will use a pasta machine to roll out and cut the noodles but try doing it yourself. There's nothing like hand cut to show that they didn't come from a package. Plus they are always a bit chewier when they are hand rolled and cut.
- 1 1/2 Cup Semolina ( I use 1 1/4 semolina and 1/4 cup all-purpose flour)
- 1/2 Teaspoon Sea Salt
- 2 Eggs
- 2 Tablespoons Water
- 2 Tablespoons Olive Oil
 Here is the cast of characters:
Celery, onions, and carrots; cut into small pieces
3 cups of beef broth
2 cup of chicken broth
about 2 cups of shredded beef
Saute the veggies in a bit of oil and add the broth and meat. Bring to a simmer and cook until the veggies are soft. Throw in the noodles fresh made noodles. If you use packaged or dried noodles you'll need some additional broth or water as they'll soak up that broth like a thirsty sailor.
Slowly simmer until the noodles are tender. Try not to stir too vigorously or the noodles will fall apart. When you use the home made noodles your broth will thicken a bit from the extra flour on the noodles. If not add a little roux and cook until thickened. I think these types of dishes are better the next day but after working this hard, it's usually right to the table.
Sunday, April 04, 2010
Coconut Pie; oh my!

If I had a family coat of arms it would be a chicken on a field of noodles wearing a coconut hat; that's if I had a crest. I will undoubtedly choose coconut over any other candy and love spring because Passover comes with the most delicious macaroons but that's for another post.
Last week was spent on the edge of the Arizona desert with my sister, Doodles and her husband and their somewhat rambunctious young cat, Bogart. Given enough time together Doodles and I will always find an antique shop to poodle through and this trip the find was an 8 inch glass pie
 plate.
My stove at home has a small, nine inch wide side oven and I've been trying to find a pie plate for about two years. Doodles is a full-time gypsy and her RV has a small oven as well. You can only imagine the joy we both experienced to find not one but a stack of old class pie plates; we each bought one.
When I got home I was dying to try it. Well, I was needing something sweet and it was sitting on my counter. Any who, I made a blind pie shell and got out my Bird's custard. Since the pie
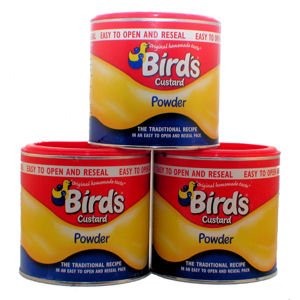 is so small I thought one pint would be enough. It should have been a bit more but it worked. Bird's is quite easy to use just add the milk and a bit of sugar. I toast my coconut because I love that flavor and texture and it's easy in a dry skillet. Toast twice as much as you need because you'll find yourself nibbling on it as the pie cools in the fridge. Or, that might just be me.
To the pud I added a handful, or so, of coconut and pour it into the shell. Just a word of warning; make sure you cook your pudding long enough or you'll have, what are darling mother used to refer to as, "spoon" pie. Not a complete failure but the filling was a bit soft which meant the whipped cream topping pushed it out of shape and when cut, the filling gushed out the sides. As a matter of fact it was mostly whipped cream but when has that ever been a bad things.
A little hint for whipping the cream, to the 1 cup of heavy cream, whipped to a very soft peak, I added 3 heaping tablespoons of powdered sugar and about 2 teaspoons of cornstarch. Then whipped the heck out of it. Don't forget to sprinkle on a bit of toasted coconut just in case you forget what kind of pie it is. Yeah, like that would happen.
Thursday, April 01, 2010
What no sourdough bread!!!
Woke this a.m. thinking of french toast. It was a icky windy cold nite and the weather doesn't look much like it's going to improve. Comfort food on cold windy days yummm!!!
French toast will help but I am all out of sourdough bread OH wait I have sourdough english muffins that'll work right.
Here ya go..............
Preheat your oven to 350* yes your oven. Now whisk 2 eggs, 3/4 cup of milk (any kind) and half & half. I did that cause I didn't have a full amount of either. Couple a pinches of cinnamon if you want, some good vanilla and a pinch of salt.
I split apart 6 muffins then heat some butter in a nonstick skillet over medium heat. Dip the muffins in the egg & milk mixture and cook in skillet 2-3 minutes per side. Add more butter if you need. Now as the pieces brown place on a baking sheet and pop them in the oven for 8-10 minutes.
 The pieces brown in the skillet then finish cooking in the oven. And when they come out they are puffy and delicious.....................see!!
French toast will help but I am all out of sourdough bread OH wait I have sourdough english muffins that'll work right.
Here ya go..............
Preheat your oven to 350* yes your oven. Now whisk 2 eggs, 3/4 cup of milk (any kind) and half & half. I did that cause I didn't have a full amount of either. Couple a pinches of cinnamon if you want, some good vanilla and a pinch of salt.
I split apart 6 muffins then heat some butter in a nonstick skillet over medium heat. Dip the muffins in the egg & milk mixture and cook in skillet 2-3 minutes per side. Add more butter if you need. Now as the pieces brown place on a baking sheet and pop them in the oven for 8-10 minutes.

Tuesday, March 16, 2010
Cast Iron Soufflé
Since I only drag out the cast iron a few times a year I like to practice a bit before I go off and try to feed a bunch of people. We are heading South to do just that in March so I've been doing a bit of outdoor cooking.
Here is a recipe I use quite often in my kitchen oven and had an idea I could fix for the potluck at the Teardrop Gathering.
The recipe was in a recent post by doodles, A trip down memory food lane.

Rinse chilies free of seeds and cut into inch pieces and assemble rest of ingredients.
Heat a 10 inch Lodge Cast Iron Dutch Oven heated with coals 14 top and 6 bottom.
 Because I'll be cooking this on a camping trip I did not use an electric mixer and whisked the eggs in a large bowl. Beat the eggs until they are thick and light yellow. Next whisk in flour and when you have no more lumps mix in the milk and salt and pepper.

Add butter to preheated outdoor dutch oven and coat the inside. Layer green chilies and cheeses and gently pour in the milk mixture.

Replace lid and cook for approximately 40 minutes turning lid and pot 1/4 turn every 15 minutes.
At 30 minutes I added two more fresh coals to the top because I wanted the cheese to brown.
I took a peek at 40 min and it was done. I tested by sticking a knife in the center and it came out clean.
Removed it from the heat and let it rest about 10 minutes without the lid. It needs to cool off a little before serving.
We had friends over that have had this before and they said this was the best one I've ever made.
Here is a recipe I use quite often in my kitchen oven and had an idea I could fix for the potluck at the Teardrop Gathering.
The recipe was in a recent post by doodles, A trip down memory food lane.

Rinse chilies free of seeds and cut into inch pieces and assemble rest of ingredients.
Heat a 10 inch Lodge Cast Iron Dutch Oven heated with coals 14 top and 6 bottom.
 Because I'll be cooking this on a camping trip I did not use an electric mixer and whisked the eggs in a large bowl. Beat the eggs until they are thick and light yellow. Next whisk in flour and when you have no more lumps mix in the milk and salt and pepper.
Add butter to preheated outdoor dutch oven and coat the inside. Layer green chilies and cheeses and gently pour in the milk mixture.

Replace lid and cook for approximately 40 minutes turning lid and pot 1/4 turn every 15 minutes.
At 30 minutes I added two more fresh coals to the top because I wanted the cheese to brown.
I took a peek at 40 min and it was done. I tested by sticking a knife in the center and it came out clean.
Removed it from the heat and let it rest about 10 minutes without the lid. It needs to cool off a little before serving.
We had friends over that have had this before and they said this was the best one I've ever made.
Thursday, March 11, 2010
Aye, Begorra! It'll be time to be cookin' up sumtin' OIrish
Not sure if I'll take this recipe for the camp out but thought it was a good one for St Paddy's Day. Would be great with that Corned beef and cabbage you're planning. I did make it in the outdoor dutch oven and pretty much followed the recipe. Either cooked outside or in your oven it is a very easy bread to make. Just don't fuss with it too much. It is like pie crust, it take a gentle hand.
First get your coals going outside for your dutch oven. I used a Lodge 10" and needed 400 degrees so I used 25 briquettes, 17 top and 8 on the bottom. Since it only cooks for 45 minutes I never replaced any of the coals but it's good to have a few extra in case it gets windy or cold. I put the coals on then made the bread dough.
Make a well in the flour mixture and stir it with a fork just until it start to come together.
 Dump it out onto a work surface and knead it together to get all the loose flour incorporated.
 I use a parchment paper sling to get it into the hot dutch oven. Crunch the parchment under the lid on and put your coals on top. Every 15 minutes turn the lid 1/4 turn and the entire DO a 1/4 turn. When you smell the bread or about 40 minutes open the lid and test with a tooth pick. If it comes out clean, it's done.

I use the parchment to get the loaf out of the hot pan.
Now, doesn't that look yummy?
 This was quite tasty and like I said, save some for the morning because it's great toasted.
Soda Bread (from American's Test Kitchen)
If you don't use cast iron it can be baked on a baking sheet. This bread is best eaten the same day but can be stored covered. The next day or two; great for toasting.
3 cups all-purpose flour
1 cup cake flour
1 1/2 teaspoons baking soda
1 1/2 teaspoons cream of tarter
1 1/2 teaspoons salt
2 tablespoons sugar
2 tablespoons unsalted butter, softened
1 1/2 cups low-fat buttermilk
1 tablespoon melted butter
Heat over to 400 degrees. Place flours, soda, cream of tarter, salt and sugar in large mixing bowl. Add butter and rut it into the flour using your fingers until it is completely incorporated and the mixture resembles course crumbs. Make a well in the center and add the buttermilk. Work the liquid into the flour mixture using a fork until the dough comes together in large clumps. Don't over mix. Turn the dough onto a work surface and knead gently until the loose flour is just moistened. The dough will still be scrappy and uneven.
Form the dough into a round about 6 to 7 inches in diameter and place in a warm cast iron skillet. Score a deep cross on top of the loaf and place in the heated oven. Bake until nicely browned and is done when a tester inserted in the center comes out clean. About 40-45 minutes. Remove and brush with melted butter. Cool for at least 30 minutes it will be easier to slice. Serve slightly warm or at room temp.
First get your coals going outside for your dutch oven. I used a Lodge 10" and needed 400 degrees so I used 25 briquettes, 17 top and 8 on the bottom. Since it only cooks for 45 minutes I never replaced any of the coals but it's good to have a few extra in case it gets windy or cold. I put the coals on then made the bread dough.
Make a well in the flour mixture and stir it with a fork just until it start to come together.
 Dump it out onto a work surface and knead it together to get all the loose flour incorporated.
 I use a parchment paper sling to get it into the hot dutch oven. Crunch the parchment under the lid on and put your coals on top. Every 15 minutes turn the lid 1/4 turn and the entire DO a 1/4 turn. When you smell the bread or about 40 minutes open the lid and test with a tooth pick. If it comes out clean, it's done.
I use the parchment to get the loaf out of the hot pan.
Now, doesn't that look yummy?
 This was quite tasty and like I said, save some for the morning because it's great toasted.
Soda Bread (from American's Test Kitchen)
If you don't use cast iron it can be baked on a baking sheet. This bread is best eaten the same day but can be stored covered. The next day or two; great for toasting.
3 cups all-purpose flour
1 cup cake flour
1 1/2 teaspoons baking soda
1 1/2 teaspoons cream of tarter
1 1/2 teaspoons salt
2 tablespoons sugar
2 tablespoons unsalted butter, softened
1 1/2 cups low-fat buttermilk
1 tablespoon melted butter
Heat over to 400 degrees. Place flours, soda, cream of tarter, salt and sugar in large mixing bowl. Add butter and rut it into the flour using your fingers until it is completely incorporated and the mixture resembles course crumbs. Make a well in the center and add the buttermilk. Work the liquid into the flour mixture using a fork until the dough comes together in large clumps. Don't over mix. Turn the dough onto a work surface and knead gently until the loose flour is just moistened. The dough will still be scrappy and uneven.
Form the dough into a round about 6 to 7 inches in diameter and place in a warm cast iron skillet. Score a deep cross on top of the loaf and place in the heated oven. Bake until nicely browned and is done when a tester inserted in the center comes out clean. About 40-45 minutes. Remove and brush with melted butter. Cool for at least 30 minutes it will be easier to slice. Serve slightly warm or at room temp.
Tuesday, March 09, 2010
A little help here for the camp cook, please
 Ah, spring in Southern California and all thoughts turn to cast iron. No? Well, mine do. Our big, once-a-year camp out is approaching and I'm getting excited. A few years ago I added my love of cooking to the camping experience which truly makes me a happy camper.
Outdoor Dutch Ovens. They are a challenge but maybe that's the appeal. Anyone can cook a stew in the oven but I can take my cast iron cookers and have a fantastic meal at the beach or any other place without electrics. We camp in that tiny trailer pictured above called a teardrop and before you scream, yes we sleep in there, too.

Every year we camp at Lake Perris with about 100 other of these little trailers and have so much fun. Trading stories and recipes, meeting new people, or re-acquainting with friends--it's lots of fun.
Saturday is always a gi-normous potluck dinner but last year someone decided to add a Friday night potluck for Outdoor Dutch Oven enthusiasts. Bring your cast iron, whether experienced or brand new, it's great to make new friends and learn something new about the challenges of cooking outdoors.
Last year I made a Cast Iron Apple Pie and chili verde; both a big success. This year I'm looking for something new so here's a big request. What should I make? It should be a dish able to simmer in one pot or bake in an oven for about 1-2 hours. Does anyone have an idea for me? Most of the prep is outside and my working space is usually a picnic table.
Reply in the comments and if you have a link to the recipe that would be great. I'm leaving next week so don't let that suggestion go to waste, leave me with an idea or two. I'll give you credit at the potluck.
Tuesday, March 02, 2010
A trip down memory food lane
 Many, many years ago my dear sister put together a collection of several of her favorite recipes, at the time. Sent as a Christmas bonus gift, at the time it was quite special. No one really did that back then. Sister was way ahead of her time.
 We always talked about having a Bed & Breakfast one time in our lives. You should have heard the husbands scream "No WAY!!!". Conversations were mostly around food and where recipes came from. Let's do a cookbook I say. It just never happened.
 Now in the day of very modern technology we have a food blog not a cookbook but it is a way of sharing with friends and family.
 My very dear niece, an excellent cook and super food enthusiast, happens to be our third writer.
This is a blog about food so I will get back to it with a terrific recipe of a Green Chile Souffle. It appeared in the collection sister shared many years ago.
 Green Chile Souffle
4 4oz cans whole green chiles
2 cups grated jack cheese
6 eggs
1 cup flour
4 cups milksalt & pepper to taste
350 degree oven
Butter the bottom of your baking dish, I use an 8x8 glass dish*. Try to remove the seeds from the chiles, rinsing them works well, but make sure they are dry. Cut the chiles into about 2 inch pieces. Layer the cheese and the chiles on the bottom of the dish. Beat together the eggs and milk, add the flour. Mix so there are no lumps. Pour over the cheese and chile. Pan should be no more than three quarters full. Bake for about 1 hour or until done in center.
Serve with some of your favorite salsa and maybe a lite salad.
*Notes..............Notice I did not use a glass dish. Also I had some leftover tri tip roast and I added some caramelized onions. Easy dish to change.
Wednesday, February 24, 2010
Spaghetti with cheese and black pepper
 This basic recipe came from SmittenKitchen by way of my sister, Doodles. She thought this dish would taste wonderful in my new pasta bowls. She was right it was tasty but made too much for just the two of us. I had half the dish leftover (more about the leftovers later.)
This is a pretty simple pasta dish but does, in my opinion, require a very good cheese and since I was ready to splurge I picked up some Parmesano Reggiano at Whole Paycheck. Seventeen bucks a pound but since there is nothing else in this recipe to mask the flavor of the cheese so go for the best.
Also grind your own pepper. It calls for 1 1/2 teaspoons but I used more. I love pepper and for this dish I used smoked peppercorns. Giving it a lightly smoked flavor. Your call. I also used penne instead of spaghetti.
What's great about this recipe is it's a start to as many variations as you can think of and I tried a bit of a twist with the leftovers. Here's what I did:
Fry one slice of bacon crisp and removed from pan, chop finely and set aside. To the pan add half cup finely diced leftover tri-tip steak. Fry gently in the bacon fat and add the leftover pasta. If it's dry add water a few tablespoons at a time. Toss with tongs and remove to bowls. Top with the reserved bacon and more cheese. A little chopped parsley couldn't hurt, now could it?
There ya go, a simple pasta two different ways. This is a recipe I'll keep and use again because I love quick and easy meals for nights when I just don't want to cook. As long as you keep your pantry stocked with the basics you're home free.
Spaghetti with Cheese and Pepper [Spaghetti Cacio e Pepe]
Serves 4 as a main, 8 as a first course
1/4 cup olive oil
1 pound dried spaghetti
2 tablespoons butter
4 ounces Pecorino Romano cheese, finely grated
1 1/2 teaspoon finely ground black pepper
Salt (optional)
Cook spaghetti in well-salted water to your al dente tastes in a large, wide-bottomed pot. (You’ll have fewer dishes to wash if you use this pot to assemble the dish as well.) Drain spaghetti, reserving 1 1/2 cups of pasta cooking water.
Dry out your pot, then heat the olive oil over high heat until almost smoking. Add drained spaghetti and 1 cup of reserved pasta water and jump back, this will splatter mightily, also known as “I made this three times, and never once learned my lesson. Do as I say, not as I do.”
Add butter, 3 ounces cheese and ground pepper and toss together with tongs. Taste, adding more pasta water, cheese, pepper or salt (which should not be necessary, as Romano is very salty) to taste.
Serve immediately, sprinkling with reserved cheese and an extra grind or two of black pepper.
Friday, February 19, 2010
Throw me somethin' mister
 My friend Crystal, who was born in New Orleans, told the story of how she got her name. When they'd pass by this sign her momma 'n them would tell her that's where they got the idea for her name, Crystal Preserves. I found this photo on the Crystal Hot Sauce site. It made me smile because our dear Crystal died a few years back and I sure do miss her, especially around Mardi Gras. Even though she was transplanted to California she always planned our Mardi Gras "feast" at work complete with "throws" she'd collected. She was a doll.
Sorry you're not with us anymore Crystal but, wherever you are, I know you've written and directed a play, sewed all the costumes--and made a great pot of red beans and rice for the after party.
Let the good times roll,
Crystal M. St. Romain
July 8, 1957 - May 16, 2003
In Crystal's honor I made a big pot of Red Beans and Rice. Everyone has their favorite recipes and I'm no different, but I did tweak it a bit. I didn't simmer the beans on the top of the stove but here's what I did.
- Soak one pound of beans over night in four quarts of water and three tablespoons salt.
- Drain and rinse the beans and add them to ovenproof pot with onions, celery, green pepper and a ham bone. Then cover with water and bring to a simmer.
- Place the covered pot in a 250 degree pre-heated oven to cook for one hour. Test the beans and cook longer if not done. They should be soft throughout.
Monday, February 15, 2010
Potato Pancakes
a bit different but tasty pancake. Found this in a Bed and Breakfast cookbook that sister and I have traded back and forth for several years.
 I am giving you this recipe from memory because I'll be darned if I can find the actual cookbook.
Make a patty, put the mixture in a medium hot pan, let set for a minute but don't let burn. Serve the pancakes as you make them because they do not hold well in a warmer.
 I am giving you this recipe from memory because I'll be darned if I can find the actual cookbook.
5 medium potatoes to end up with approx.
1 1/2 cup shredded
1 bunch green onions cut small include some of the green
1/2 cup all purpose flour
2 large eggs
salt & pepper to taste
canola oil for frying
Sometimes I cheat and use a package of already shredded potatoes. Don't judge me I live in an RV and space is valuable lol!! Whichever potato you use be sure to squeeze the moisture out of them. Try two clean dish towels that usually works well for me.
In a large bowl mix together all of the above ingredients except the oil, put some oil in the frying pan heat to a medium high. While you are frying up the pancakes keep a piece of plastic wrap over the mixture sometimes it will discolor if you don't.
In a large bowl mix together all of the above ingredients except the oil, put some oil in the frying pan heat to a medium high. While you are frying up the pancakes keep a piece of plastic wrap over the mixture sometimes it will discolor if you don't.
Friday, February 12, 2010
How we do it: hamburger
 Let me ask a question: what kind of hamburger do you buy?
- I examine each package for fat content
- I buy what's on sale
- I throw in one of those plastic sleeves of hamburger because I can't stand the look of ground meat.
A few months ago I noticed Von's had a boneless chuck roast for sale and asked the man stocking the bins if he could grind this for me. Oh, it was his pleasure and was back in just a few minutes with my ground chuck. And when I cooked this hamburger it actually tasted like something other than cardboard; it tasted like beef. Imagine that. So when I hand the butcher my chuck roast it comes back just that chuck roast and nothing else.
I've been fortunate to find boneless chuck roasts on sale. This one was $2.99 a pound and I don't think that's too much for good tasting chopped meat. I'll leave it up to you but I now look for roasts on sale and when I do we have dinners like meatballs or meatloaf or chili, but the chili, that's another post.
If you try this let us know. Do you taste a difference or if you think this is way too much trouble and just buy one of those plastic sleeve o'meat.
Thursday, February 11, 2010
Give-away winner
Our winner for the give-away was chosen very scientifically. The names for both sites were written down, cut into strips, and put in a hat. They, one name picked out. Check out the Facebook page for the winner.
Thanks
Thanks
Subscribe to:
Posts (Atom)