Friday, April 03, 2009

Bite the cookie

Sometimes I become obsessed with food and make and remake recipes until I like them. Cookies are on the Hit Parade right now so bear with me, folks.

I adore cookies, all types, flavors, and sizes. If I'm thumbing through a magazine cookie photos will make me stop, asses the recipe, and tear it out for later. I've piles of snippets stuck in the back of my cook book. Someday I'll organize them, ha!

Let me sing the praises of the cookie. Easily stored in a variety of containers, put in a slice of bread alongside cookies you want to stay soft, you don't need a fancy jar though I enjoy my crock. You don't need a plate or a fork or any fussy presentation; hands work great. It's portable, you can walk by the cookie jar, on your way to the gym, and snag one or three. They are a favorite of all ages, cultures, and cooks. I bet your family has its favorite and it's time you made them some right now.

Here is my latest Vanilla Pecan Refrigerator Cookies. I can't say where I got this recipe but I do enjoy having a log of refrigerator cookies in the freezer. I can bake the entire recipe or maybe just a dozen for my beloved and me. He likes them, too. Though shortbread cookies are my all-time favorite these little gems are easy, quick and delicious. I've been going for more of a crispy cookie lately and, since there is only white sugar, they fill that order. I used butter but if you use shortening they might be a bit crispier; I'll try that next time.

Vanilla Pecan Refrigerator Cookies

1 cup unsalted butter or shortening
2 cups sugar
2 eggs
2 tablespoons vanilla (yes, this is correct)
3 cups flour
1 teaspoon baking soda
1 teaspoon salt
1 cup chopped pecans (nice if you toast them)

Cream the butter and sugar until fluffy. Add eggs one at a time and beat well after each. Add the vanilla. Combine the flour, baking soda and salt in a separate bowl. Use a spoon to stir in the flour mixture into the sugar mixture. Add the pecans, mixing well. Shape into three rolls about 2 inches in diameter and wrap in was paper. refrigerate at least two hours or up to three days. You can also freeze.

Bake in 375 oven. Cut the dough into 1/4 inch slices 2 inches apart on cookie sheet. Bake about 10 minutes until lightly browned. Cool on wire rack and store in airtight container. Makes about 6 dozen.

Editor's note: My husband usually can take or leave cookies, I know, why would I marry someone like that? With these he can't keep out of the cookie crock. It has quite a heavy lid so I can always tell when he's in there. I asked what he liked about them and he couldn't put his finger on the reason. Finally, who needs a reason to eat a cookie!

Let us know your family favorite cookie.

Monday, March 30, 2009

Cast Iron Potluck a big success

Here's an update on my earlier post, Cast Iron Pie. I made the changes I mentioned in the recipe and it was very well received.

We all had fun talking with one another, sharing recipes and techniques, and then sitting down to eat. My Apple Pie wasn't as pretty as the early post but was very tasty. I'll make that again.

Tuesday, March 24, 2009

Plain but perfect

There are as many sugar cookie recipes as there are families. For roll out cookies I'd made the same recipe over and over until I found Sylvie's on Soul Fusion Kitchen. Perfect for cookie cutters but growing up I remember a plain sugar cookie with the tops dusted with sugar. As luck would have it I found a recipe to satisfy that old memory.

While celebrating Christmas at Mary's, my step-mother, I found some cookies she'd baked but didn't have out. She said they were a little stale. They were exactly what I was looking for, well not the stale part, but I asked her to send the recipe and now I make these regularly. I only make a half recipe because my darling and I would sit down and eat them all and four to five dozen is way too many.

They are dusted cinnamon and sugar and are made with butter and oil and couldn't be easier to throw together. I hope you enjoy them.

Sugar Cookies
1 cup powdered sugar
1 cup white sugar
1 cup margarine (I used unsalted butter)
1 cup cooking oil

Cream together – beat until fluffy.

Beat in 2 eggs

4 cups plus 4 tablespoons
1/2 teaspoon table salt
1 teaspoon baking soda
1 teaspoon cream of tarter
1 teaspoon vanilla

Preheat oven to 350 degrees. Drop by rounded teaspoonfuls onto a greased cookie sheet. In a small bowl, combine some sugar and cinnamon. Using the bottom of a drinking glass, spread with margarine, dip it into the sugar and cinnamon mixture, and press on top of each cookie. Cook for about 10-15 minutes.
Friday, March 20, 2009

Happy find


I don't often do product review/rave but I am doing one here about Panko I use panko a lot in a variety of ways. I just found this new product at my local Safeway/Von's and I'm sure maybe your local market. Go take a look at the web site and see some recipes ideas. If you try it email me and let me know how you like it please. Oh I just used it as a topping for mac & cheese makes for a nice crunchy top.

Wednesday, March 18, 2009

Cast Iron Apple Pie

Since I'm planning to participate in a Outdoor Dutch Oven demo when we go camping the end of the month I though I'd better try out this new recipe before I did. I saw this recipe on America’s Test Kitchen (www.americastestkitchen.com) on public television's Beg Week and thought I could convert it to iron. I followed the recipe as stated and the product was, ok. I hate, just ok so when I do this again I'll make some adjustments. There are also adjustments to using an Outdoor Dutch Oven.

The sauce had little flavor and was not thick enough. They use cornstarch and I'm not a fan of that to thicken pies so I'd use flour next time. Also, you need to adjust the thickening agent for the different apples. Some, more juicy that others, will take more flour. Now cinnamon is not to everyone's taste but an 1/8 of a teaspoon, who could even taste that. I'll add more. I've made my suggestions in red for the changes to the recipe and green for the adaptation to cast iron.

For the camping trip, I'll pre-make the pie dough and slice the apples and sprinkle with lemon juice to keep them from getting brown.

Skillet Apple Pie
from the Episode: Easy Apple Desserts

If your skillet is not heatproof, precook the apples and stir in the cider mixture as instructed, then transfer the apples to a 13- by 9-inch baking dish. Roll out the dough to a 13- by 9-inch rectangle and bake it as instructed. If you do not have apple cider, reduced apple juice may be used as a substitute—simmer 1 cup apple juice in a small saucepan over medium heat until reduced to 1/2 cup (about 10 minutes). Serve the pie warm or at room temperature with vanilla ice cream or whipped cream. Use a combination of sweet, crisp apples such as Golden Delicious and firm, tart apples such as Cortland or Empire.

Serves 6 to 8

Crust
1 cup unbleached all-purpose flour (5 ounces), plus more for dusting work surface
1 tablespoon sugar
1/2 teaspoon table salt
2 tablespoons vegetable shortening , chilled
6 tablespoons (3/4 stick) cold unsalted butter , cut into 1/4-inch pieces
3–4 tablespoons ice water

Filling
1/2 cup apple cider (see note)
1/3 cup maple syrup
2 tablespoons fresh lemon juice from 1 lemon
2 teaspoons cornstarch (I'll use 4 tablespoons flour)
1/8 teaspoon ground cinnamon (I'll use 1-2 teaspoons)
2 tablespoons unsalted butter (I'll use 3 tablespoons)
(I'll use 3 tablespoons brown sugar)
2 1/2 pounds sweet apples and tart apples (about 5 medium), peeled, cored, halved, and cut into 1/2-inch-thick wedges

1 egg white , lightly beaten
2 teaspoons sugar

Use a 12 inch deep outdoor dutch oven. Pre-heat with 25 coals underneath, lid on, until pan is hot.

1. FOR THE CRUST: Pulse flour, sugar, and salt in food processor until combined. Add shortening and process until mixture has texture of coarse sand, about ten 1-second pulses. Scatter butter pieces over flour mixture and process until mixture is pale yellow and resembles coarse crumbs, with butter bits no larger than small peas, about ten 1-second pulses. Transfer mixture to medium bowl.

2. Sprinkle 3 tablespoons ice water over mixture. With blade of rubber spatula, use folding motion to mix. Press down on dough with broad side of spatula until dough sticks together, adding up to 1 tablespoon more ice water if dough does not come together. Turn dough out onto sheet of plastic wrap and flatten into 4-inch disk. Wrap dough and refrigerate 30 minutes, or up to 2 days, before rolling out. (If dough is refrigerated longer than 1 hour, let stand at room temperature until malleable.)

3. FOR THE FILLING: Adjust oven rack to upper-middle position (between 7 and 9 inches from heating element) and heat oven to 500 degrees. Whisk cider, syrup, lemon juice, cornstarch, and cinnamon (if using) together in medium bowl until smooth. Heat butter in 12-inch heatproof skillet over medium-high heat. When foaming subsides, add apples and cook, stirring 2 or 3 times until apples begin to caramelize, about 5 minutes. (Do not fully cook apples.) Remove pan from heat, add cider mixture, and gently stir until apples are well coated. Set aside to cool slightly.

For DO: Add butter, then apples to the preheated DO. Stir and cook until apples begin to caramelize. Remove DO from coals add cider mixture stirring to coat the apples. Dust in more flour, if needed.
4. TO ASSEMBLE AND BAKE: Roll out dough on lightly floured work surface, or between 2 large sheets of plastic wrap, to 11-inch circle. Roll dough loosely around rolling pin and unroll over apple filling. Brush dough with egg white and sprinkle with sugar. With sharp knife, gently cut dough into 6 pieces by making 1 vertical cut followed by 2 evenly spaced horizontal cuts (perpendicular to first cut). Bake until apples are tender and crust is a deep golden brown, about 20 minutes. Let cool 15 minutes; serve.

For DO: After you cut the pie dough, place 4 coals on the bottom and remaining on the lid. Most of the heat should be towards the outside with a few in the center. You can see I had not enough on the rim. Turn lid every five minutes 1/4 turn and bake until crust is golden brown. I needed 25 minutes. Resist opening the lid until 20 minutes have passed.

This will be quite hot but it needs to be dished up since the DO hold onto that heat for a long time. I spooned it into bowls.

If you are camping and prep this before hand it is a great dessert. I might even try this in my regular home oven.

Saturday, March 07, 2009

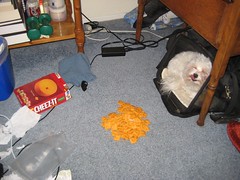
bad yet remarkably neat dog


bad yet remarkably neat dog
Originally uploaded by lornababy
i forgetfully left an open box of cheez-its within dog reach. when i got home from work, the dogs had gotten into the box. if you look in the bottom left of the corner of the photo, you can see that they pulled the inner bag out of the box, then completely emptied the bag into a neat pile. i like to imagine them running back and forth to the cheez-it pile all day long to take one cheez-it at a time. however, it's more likely that this had just happened right before i got home and i caught them in the act.

fwiw, they didn't get in trouble for this, it was my fault for leaving the box within their reach. i made max sit by the cheez-it pile for the photo. i was just lucky i caught him licking his lips when i snapped the pic.

Friday, March 06, 2009

Spring time asparagus

if you are an asparagus lover this is just the best time.
We are big time asparagus fans and have it quite often in a variety of ways................one of which is the omelet I made recently.


saute up a bit of the tender, fresh asparagus............I like my asparagus a bit crunchy and definitely not mushy.


add the sauted asparagus and some of your favorite cheese that you shredded not that already shredded dry stuff you buy in the market, add that to your eggs and VOILA!!!

Asparagus Omelet


Tuesday, March 03, 2009

Zucchini Stir-fry

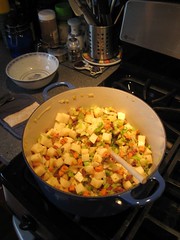
Zucchini has always fascinated me. Left raw, it leaves me cold and cooked too much, it's mush. For a long time I've made a stir-fry zucchini dish that would go from perfect to the afore mentioned mush in an instant. It has onions, tomatoes, and zucchini cut into slices and I've experimented with many different incarnations.

After eating a similar dish at the Getty Center for lunch last week I came up with what I think is a winner. The squash held up quite nicely and was still nice and firm the next day for lunch.

Recipe

Two small zucchini squash sliced in 3/4 inch slices
1/2 sweet onion sliced in wedges
1 cup sliced Crimini mushrooms*
1/4 cup pesto without cheese
1 Roma tomato, quartered seeds removed

I made a quick pesto with about a cup of fresh basil, chopped garlic, salt, pepper and enough olive oil to make a paste.
I cut the squash in circles at least 3/4 of an inch wide. This way I could get some "color" on the zucchini without cooking it to death.
I cooked the onions and mushrooms separately, removed them from the pan to saute the squash with the pesto. Then, when it was just barely cooked, I tossed back the onions and mushrooms and quartered Roma tomatoes. This only gets a very quick stir to heat the tomatoes and blend the flavors. Off the heat I tossed in some Parmesan cheese and served.

Thursday, February 26, 2009

Out my door


stands this beautiful tree. The fruit on this tree is a limon, which as you probably know is a cross between a lemon and a lime.

Here we sit in our RV in Mesa, AZ fruit trees everywhere around us. And we are so lucky to have access to this bountiful limon tree.


Asked Mr Doodles to pick me some ripe fruit so I could make a Key Lime pie. Notice the the skin is the lemon but the flesh is the lime, dang these are good so I knew what a great pie they would make.

Here ya go but this photo does not do this pie justice one bit cause Mr Doodles said "ya know living in the Florida Keys we had access to some of the best key lime pies in the world, this is better than any of those". WOW!!! what a compliment huh? He's my sweetie tho.

Now where I got the recipe I do not know but it is one I have used for years, it's the key lime pie that gives you that tart taste but rich enough to curl your toes.

So if in fact you do partake in this recipe don't email me about the calories I already know, but what is worrisome is that there is still more of the little gems coming ripe on that beautiful limon tree, there goes the hips.

Citrus Key Lime Pie


Crust
2 1/2 cups graham cracker crumbs or cheat like I do sometimes buy a prepared crust
3 tbsp sugar
5 tbsp butter, melted

Filling
1 can (14-oz) sweetened condensed milk
3 large eggs
1/2 cup key lime juice NEVER use bottled juice/regular limes are OK
2 tsp lime zest

Preheat oven to 350F.
In a large bowl, or a food processor, combine wafer cookie crumbs, sugar and melted butter, stirring until mixture resembles wet sand. If you are using vanilla wafers or graham crackers, add 2 tsp lemon zest or lemon extract.
Pour into a 9-inch pie plate and press into an even layer across base and up sides.
Bake for 10-12 minutes, until the crust begins to lightly brown.
Cool completely before filling.

Preheat oven to 300F.
In a large bowl, whisk together sweetened condensed milk, egg, lime juice and lime zest until mixture is smooth. Pour into prepared crust.
***Bake for 20 minutes, until filling is just set.
Cool to room temperature then chill in the refrigerator before slicing.
Top with whipped cream to serve.

*** not everyone bakes their key lime pie..........I always have because of the eggs.


Tuesday, February 24, 2009

Cast iron biscuits: so tender

The weather is starting to warm up and it's outdoor dutch-oven time, again. The last trip to the beach I brought and bought my cast iron collection to practice for our Tear Drop camp out in March. I've been perfecting a recipe for the potluck, Chili Verde but I tried a new one for biscuits. Who doesn't like the smell of freshly baked biscuits while camping?

Because our weather did not allow me to set up outside I modified my biscuits to the indoor kitchen. Instead of the outdoor dutch-oven I used my ancient iron skillet. This was passed down from my Grandmother, Emily to my Mom, Lorna and then to me. I use it to cook fried chicken, among other things, and it is seasoned to perfection.

My recipe for biscuits is easy:

2 cups AP flour
1/2 teaspoon salt, not kosher
2 teaspoons baking powder
1 teaspoons baking soda
1/2 cup shortening, cold cut into pieces
1 cup buttermilk
1 or 2 tablespoons canola oil

You will need a ten inch iron skillet, hopefully seasoned. If not you can make this in a glass dish.
Preheat oven and iron skillet, 400 degrees.

Mix dry ingredients then cut in the shortening until it resembles course sand. I use a pastry blender but you can also rub it between your fingers.

Pour in buttermilk and gently mix with a fork and dump out on floured surface. Gently knead with floured hands and then fold over a few times and pat it to about an inch thick.

With a floured cutter, I use a wine glass, cut out as many biscuits as you can, then gather the remaining dough together; gently and repeat. Did I say gently enough times?

Remove your hot skillet from the oven and add oil tilting until it covers. Place each biscuit in the skillet. I just touch the top in the oil and roll the biscuit over to get a bit of the hot oil on top. Be careful the pan is hot and it should sizzle. You want to crowd them in so they all touch, I get eight in my 10 inch pan.

Bake for about 18-20 minutes until tops are slightly golden.

I should tell you to enjoy but I can't imagine anyone not enjoying hot biscuits and honey butter.

If you want to do these while camping use a ten inch camping dutch oven. I put eleven coals on top and only five underneath. Remember to preheat that DO smoking hot before putting in the oil and the dough. Turn every five minutes. Cooking time should be the same.

Friday, February 20, 2009

Birthday cake

More from the Princess' birthday cake. I was chastised by Laura Rebecca to post more photos and a recipe. Thanks for the prod, Laura. Check out her blog she seems to be a proficient baker.

This recipe is from America's Test Kitchen and I did not change the recipe a bit. Mine came out more dense than I thought but still quite tender. I do believe the key is everything needs to be room temperature.

The first time I made this cake, every cake has an audition in my kitchen, I did not frost it but used the odd vanilla filling I post about last week. Auditioned cakes get shared with my neighbor and she really liked it. She doesn't realize it but she's my food tester. Well, maybe now she does since she does read the blog.

To frost this cake I used a product called "Frosting Pride" I get it at Smart and Final and it tastes like a whipped cream frosting. Very easy and quite tasty you can add color and I've added softened cream cheese before. As you can see, decorating is not my strong suit.

I doubled this recipe for a half-sheet pan

2 1/2 cups cake flour , plus extra for dusting pans
1 1/4 teaspoons baking powder
1/4 teaspoon baking soda
3/4 teaspoon table salt
1 3/4 cups sugar (12 1/4 ounces)
10 tablespoons (1 1/4 sticks) unsalted butter , melted and cooled slightly
1 cup buttermilk , room temperature
3 tablespoons vegetable oil
2 teaspoons vanilla extract
6 large egg yolks , room temperature
3 large egg whites , room temperature


1. Adjust oven rack to middle position and heat oven to 350 degrees. Grease two 9-inch-wide by 2-inch-high round cake pans and line bottoms with parchment paper. Grease paper rounds, dust pans with flour, and knock out excess. Whisk flour, baking powder, baking soda, salt, and 1 1/2 cups sugar together in large bowl. In 4-cup liquid measuring cup or medium bowl, whisk together melted butter, buttermilk, oil, vanilla, and yolks.

2. In clean bowl of stand mixer fitted with whisk attachment, beat egg whites at medium-high speed until foamy, about 30 seconds. With machine running, gradually add remaining 1/4 cup sugar; continue to beat until stiff peaks just form, 30 to 60 seconds (whites should hold peak but mixture should appear moist). Transfer to bowl and set aside.

3. Add flour mixture to now-empty mixing bowl fitted with whisk attachment. With mixer running at low speed, gradually pour in butter mixture and mix until almost incorporated (a few streaks of dry flour will remain), about 15 seconds. Stop mixer and scrape whisk and sides of bowl. Return mixer to medium-low speed and beat until smooth and fully incorporated, 10 to 15 seconds.

4. Using rubber spatula, stir 1/3 of whites into batter to lighten, then add remaining whites and gently fold into batter until no white streaks remain. Divide batter evenly between prepared cake pans. Lightly tap pans against counter 2 or 3 times to dislodge any large air bubbles.

5. Bake until cake layers begin to pull away from sides of pans and toothpick inserted into center comes out clean, 20 to 22 minutes. Cool cakes in pans on wire rack for 10 minutes. Loosen cakes from sides of pans with small knife, then invert onto greased wire rack and peel off parchment. Invert cakes again and cool completely on rack, about 1 1/2 hours.

Wednesday, February 18, 2009

A satisfied customer

This is one of the cakes I made last weekend. The little cake with an E was for the Princess in honor of her first birthday. I made a larger adult cake, too. She wasn't too sure what to do with it but once a piece was cut she picked it up and had a taste. She just didn't want to soil her dainty fingers.

Monday, February 16, 2009

A creamy cake filling

Having no pictures because my camera is wonky should not be an excuse for not posting but, regrettably it has been. I'm posting this recipe because I found it odd. While searching for the perfect cake for a first birthday I ran across this filling. In the final cake I ended up not using it but thought it would be an interesting post, anyway. I guess it's because I like odd things.

What I found odd was, you make a cream sauce then add butter and shortening, sugar, and a bit of vanilla. I was sure it wouldn't be any good so I tried it and was pleasantly surprised. It is light and not too sweet and would hold up to adding a bit of fruit or jam. I wonder why I'd not heard of this one before. The first time I made it I used non-fat milk, all I had on hand, but when I made it again with half-and-half I didn't notice much difference.

This is a Paula Deen recipe.

5 tablespoons flour
1 cup milk
1 cup sugar
1/2 teaspoon salt
1/2 cup shortening
1/2 cup butter, softened
1 teaspoon vanilla extract

In a lidded container shake the flour and milk until mixed. In saucepan, cook and whisk until thick. It's a cream sauce and you don't want lumps so whisk the hell out of it. Cool.

In bowl, combine sugar, salt, shortening, butter and vanilla. Beat with electric mixer until fluffy, then add the cooled milk mixture and beat again, until fluffy.

Thursday, January 29, 2009

A new favorite


tasty oil...........I found this at a farmers market that we recently visited

I am a huge fan of Meyer lemons and anything that pertains to such lemon. I understand that Trader Joe's now carries a cookie that is made with Meyer lemon that is similar to a graham cracker..........looking forward to finding these when we get near a TJ's again.

Stay tuna'd for some recipes using this new find!!!

Friday, January 23, 2009

Soup's on......updated


Quite tasty and hit the spot due to the coolers temps we have been having these last few evenings.


well not quite but it sure is in the works..............making beef barley soup. Which is no big deal but it sure fits with the weather.

What's your favorite soup recipe........send us a link cause I have a feeling soup season is gonna be around for a few more weeks. I'm a cream soup lover but beef barley just seems to fit the bill today and I also had these meaty beef shanks that I had to use.

Stay tuna'd for a photo maybe and a review from Mr Doodles.

I might also add that our very own "lil bird" and her sweet husband attended the inauguration this past week as well as one of our favorite bloggers Sylvie. Go check out their blogs for photos of the historic event and see if they thawed out yet!!!

Tuesday, December 23, 2008

Our wish for our friends

Saturday, December 06, 2008

Your attention please.........

The PBE ladies are going to take a break for a few weeks, not that we haven't done that already...............sorry bout that!!!

It seems that lil' bird is so busy with work also her and her sweet bunky are readying up to attend the Inauguration in January.....how cool is that.

My sweet sister Moon is now our resident juror being called up to perform her civic duty one more time as well as getting ready for the Christmas celebration that is just around the corner.

And me well, my sweet hunky husband and I are managing a Christmas tree lot and right now I do not have a moment to eat let alone cook!!!

So please forgive us for not holding up our PBE duties. If in fact that we do get a chance to cook something or even share a tid bit we'll pass it along.

As I always say.............stay tuna'd!!!

Friday, November 28, 2008

The movable feast


Thanksgiving is a universal, one size fits all, no present required, small effort holiday. What is not to love about that! For our family it's also a movable feast. To accommodate the odd schedules we shift it around a bit and this year it landed the Saturday before the traditional date. This works on a number of levels. No crowds at the market before the event. All the store are stocked with all the appropriate items and they are super fresh. Why not?

We had three together to cook the day before; a great idea. Doodles, step-mom Mary, and myself chopped and mixed and baked up a storm leaving the turkey for the actual day. You must have that wonderful roast turkey smell awaiting the guests. Our guests this year were Pat and Frank, Mary's sister and brother-in-law. We must do the prep early as it is our tradition to drink Mimosas on Thanksgiving.

This year we had the traditional Thanksgiving fare. A wonderful fresh Foster Farms turkey from Costco. It was the tastiest bird I've had in a long while. Sometimes the turkey can taste something like a big chicken but this bird had flavor. We didn't brine it because I sort of ran out of energy but you would have thought we did. It was so juicy even the wings were tender.

Everyone has their own favorite way to roast a turkey and I give it a blast of high heat for about fifteen minutes, then cover the breast with heavy foil and reduce the heat to 325 for a good long time. The last thirty to forty minutes I remove the foil to crisp up the skin. The thighs get done without the breast drying out and it was amazing. Also, don't try this without a meat thermometer and let it rest a good thirty minutes before carving. Don't forget it give it a nice foil blanky to keep it warm. If in doubt, go to the Butterball Turkey website. It has all sorts of tips and roasting times.

Not anything new except a wonderful cranberry relish from lil bird. Maybe she'll share that recipe. I will put a link to our must have broccoli casserole.

Oh, and Christmas this year, a day or two after. Like I said, "It's the people, not the day."

Wednesday, October 22, 2008

Chicken with Sherry

Most of my meal planning, unless I'm doing a dinner party, is done at an open refrigerator. What do you have for me today? This week I had a couple of chicken breasts, some crimini mushrooms and the normal stuff in the cupboard.

Mushrooms: left the small ones whole and quartered the larger ones. Sauteed them in butter and olive oil, some salt and pepper and at the last 30 seconds tossed in a few cloves of chopped garlic. Damn, that smells good. Removed to a dish.

Chicken breast: sliced them across the grain and flattened the slices. Dredged these in seasoned flour and sauteed in mushroom pan with a bit more olive oil; quickly removing when each was lightly browned.

Cooked some linguine in boiling water until just cooked; drained. Always save a bit of the pasta water. Some restaurants call that "profit."

Finish: deglazed the pan with a bit of chicken broth, added chicken and mushrooms back to pan along with 1/4 cup of creme fraiche, fresh chopped thyme and a good splash of Spanish Sherry. This simmered for a few minutes to blend the flavors. To this add the hot, drained linguine and a bit of the pasta water if the sauce needs thinning.

Serving: into the hot dish I tossed about a half cup of grated Parmesan and topped with chopped fresh Italian parsley and a bit of salt.

I love these flavors together. Chicken, thyme, garlic and sherry. The creme fraiche just makes the sauce milder and very rich. Dredging the chicken in flour adds a bit of thickness to the sauce as well. This dish is loaded with flavors and it is easy to overlook the salt. I feel you really must taste before serving because salt seems to tie all the flavors together.

Question: Do you plan your meals? If so, how far ahead?


Sunday, October 19, 2008

Philippe's


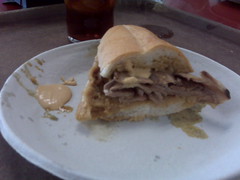
Philippe's pork french dip
Originally uploaded by lornababy
sorry for the blurry photo, but this was taken with the ol' cel phone camera. this is a philippe's the original pork french dip sandwich with their spicy mustard. oh yum. philippe's claims to have created the french dip sandwich. they celebrated their 100th anniversary this month with 10 cent sandwiches and the line was around the block.

Friday, October 17, 2008

My Chile Verde

What you don't see in this photo is the warm tortillas and the bottle of Corona.

I happened to get my Cooking Light magazine about the same time I was given the green chiles I have been raving about in previous posts.

The recipe featured fresh roasted Anaheim chiles, which are moderately spicy. Spike it with hot sauce, if you like more fire.

I might also say that there are many, many variations of this dish........I just found this recipe quite nice.

Yield

6 servings (serving size: about 1 cup)

Ingredients

  • 12 Anaheim chiles, halved and seeded (about 1 1/2 pounds) I used the much raved about Denver chiles
  • Cooking spray
  • 2 cups chopped onion (about 2 medium)
  • 1 1/4 pounds boneless pork loin, cut into 3/4-inch pieces
  • 2 garlic clove, minced
  • 2 cups fat-free, less-sodium chicken broth
  • 1 teaspoon dried oregano
  • 3/4 teaspoon kosher salt
  • 1 (15.5-ounce) can white hominy, drained and rinsed

Preparation

1. Preheat broiler or use your BBQ

2. Place chiles on a foil-lined baking sheet; broil 8 minutes or until blackened, turning after 4 minutes. Peel and chop.

3. Heat a large Dutch oven over medium-high heat. Coat pan with cooking spray. Add onion, pork, and garlic to pan; sauté minutes or until pork is browned. Add chopped chiles, chicken broth, oregano, and salt; bring to a boil. Cover, reduce heat, and simmer 1 hour or until pork is tender. Stir in hominy; cook 10 minutes or until thoroughly heated.

Nutritional Information............Calories: 243 (28% from fat) Fat: 7.5g (sat 2.6g,mono 3.3g,poly 0.9g)Protein: 24.8g Carbohydrate: 20gFiber: 3.3g Cholesterol: 56mg Iron: 2.4mg Sodium: 389mg Calcium: 51mg

Sunday, October 12, 2008

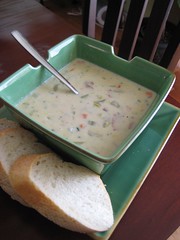
clam chowda


i'm not emeril's biggest fan, he's a bit overdramatic for me. case in point, he calls this dish "clam chowder of love." that being said, this soup is so good i have to make up a word, it is fantabulous. probably the best chowder i've ever had. the leeks and the bacon totally make this dish, giving it layers of flavor. it's definitely not low fat, but it tastes sooo good. you could probably make it with half and half or even milk, but why?

here are the ingredients...

clam chowda
  • 1/2 pound bacon, medium dice
  • 1 cup chopped leeks (about 1 pound)
  • 1 cup chopped yellow onions
  • 1 cup chopped celery
  • 1 cup chopped carrots, peeled
  • Salt
  • Freshly ground black pepper
  • 3 bay leaves
  • 1 tablespoon chopped fresh thyme
  • 1/2 cup flour
  • 1 pound white potatoes, peeled and medium diced
  • 4 cups clam juice (i used 5)
  • 2 cups heavy cream
  • 2 pounds littleneck clams, shucked, chopped (i used 3 cans of chopped clams and drained the juice to make up the clam juice - could've used 4 cans)
  • 2 tablespoons finely chopped parsley
and the steps...

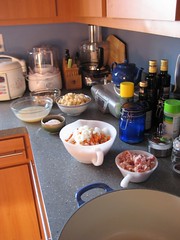
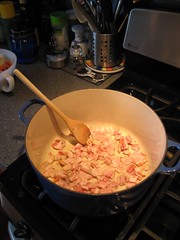
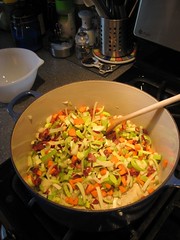
In a heavy stock pot, over medium-high heat, render the bacon until crispy, about 8 minutes.

clam chowda

Stir in the leeks, onions, celery, and carrots. Saute for about 2 minutes or until the vegetables start to wilt.

clam chowda

Season the vegetables with salt and pepper. Add the bay leaves and thyme. Stir in the flour and cook for 2 minutes. Add the potatoes.

clam chowda

Stir in the clam juice. Bring the liquid up to a boil and reduce to a simmer. Simmer the mixture until the potatoes are fork tender, about 12 minutes.

clam chowda

Add the cream and bring up to simmer. Add the clams and simmer for 2 minutes. Stir in the parsley. Season with salt and pepper if needed.

clam chowda

Enjoy!

clam chowda

Saturday, October 11, 2008

Baby washing; complete

It seems like we've given up on PBE but we are not quitters we're just distracted by a few goings on. Doodles and the Gypsy Caravan are on the move, lil bird is bogged down with work responsibilities and myself, well Moon's just being Moon. We can't blame any of our usual readers if they've drifted off but we will make more of an effort to continue, at least through the tough times.

Some of my time was spent getting ready for a small twenty person reception after the Christening of our little Princess. I received much help from sister Doodles and daughter lil bird. I know it would not have been a success without them.

Doodles and I had great fun planning the menu and I have to say all of the food was a big hit. Some was bought pre-made, others we made ourselves. The menu was Asian, as per the request of the parents of the princess. Both Doodles and myself were a bit dumbfounded when one item stood out above the rest, Radish with Garlic Ginger Cream Cheese. People could not stay away from them.

Here's how we developed the recipe. I had an extra package of cream cheese, we had loads of garlic, ginger, and chives, and we found a way to transport all of this to a mouth; the radish. We literaly needed something else cold and started adding flavors. Our first choice was daikon but it lacked the color and punch.

To 8 oz of softened cream cheese add:
  • about 1 tablespoon each of grated ginger and pressed garlic
  • a bit of milk to loosen the cheese
  • pinch of salt
  • few tablespoons of minced chives
All of the above is to taste but we made it strong to balance the radish.

Slice large radishes in thirds, small ones in half and dry. Pipe cream cheese on top and serve immediately. I made the cheese mixture the day before and put it in the piping bag already to go the next day. Doodles dried the radish and piped them on the serving plate. Very efficient. Like I said, easy and everyone was popping these little gems like crazy.
Menu
Asian Meatballs with Hoisin sauce
Shrimp Tempura (pre-made from Costco)
Chicken Teriyaki (pre-made from Costco)
Pineapple sausage (Costco)
Chinese chicken salad
Pork pot stickers dipping sauce (Trader Joes)
Wings with lime dipping sauce
Tofu satay with p-nut sauce
Radish with spiced cream cheese
Fresh pineapple and strawberries skewers

Red Velvet cupcakes with cream cheese frosting

Banana orange punch

I will get some additional photos and recipes up in the coming days; oh sure, how about weeks that sounds more like me.

Tuesday, September 09, 2008

Denver Green Chiles


never heard of them???...........neither had I, until a local farmer bring me some the other day.

Right now Mr Doodles and I are residing in South West Colorado.......read about that here if you care to.


A few weeks ago this fellow came in on his way back to his farm to talk about storing his boat on property here at the RV park
for the winter. I happened to be reading a cooking magazine at the time. "Ya like to cook"? he says.........ha I sure do and am always looking for local foods to use. "Do you ever cook with chiles"? O you betcha I do!!! "Well I grow chiles on a little plot of land on my farm they are called Denver green chiles and they taste a lot like New Mexico Hatch chiles. I will be roasting some around the beginning of September and I'll bring you some". Now when someone says that I'm always a tad skeptical.....BUT.......two days ago this fellow, my new best friend, walked in with TEN pounds of these magnificent chiles. My teeny brain just started spinning for recipes immediately thought of green chile quesadillas and chile verde......oh my word!!!!!!!! Now I googled freezing chiles.......don't ya just love Google, any way I found a site that tells how to prepare chiles for freezing. Unfortunately fresh roasted chiles cannot be kept in the fridge for more that a few days because they will mold. So sister moon and niece lil' bird will be getting some fresh frozen chiles when I arrive soon.

Let me get to the very simple method of a chicken, green chile quesadilla that I made last nite.

Ingredients

2 flour
tortillas
grated cheese of your choice
chicken or steak.........leftovers a great for this if no sauce was used
green chile cilantro
If I had some caramelized onions I would have added those


Method place your first flour tortilla in a skillet, start layering your ingredients, I start with cheese, then the meat, the chiles, cilantro a bit more cheese and top that off with the other flour tortilla. Turn the heat to med to low, place a lid on and carefully watch so as not to burn the tortillas but the cheese melts nicely and the inside heats the meat. Once one side is a bit toasty turn over with a wide spatula and continue for another minute or two till the contents are warmed thru and the cheese is well melted. I serve with a fresh salsa as well as sour cream mixed with some green sauce and extra cilantro.

Saturday, September 06, 2008

omnivore's hundred

tim at very good taste is doing a little meme called the omnivore's hundred. here's how it works:

1) Copy this list into your blog or journal, including these instructions.
2) Bold all the items you’ve eaten.
3) Cross out any items that you would never consider eating.
4) Optional extra: Post a comment here at www.verygoodtaste.co.uk linking to your results.

here's how we'll do it. first, the list is long and posting all three of our lists would be very long indeed. second, i thought it'd be cool to do a little cross promotion of our individual blogs (so you can see what we've been up to lately, as it has obviously not been food blogging). so, we're posting the original list first. then, immediately below will be a hyperlink to each of our three lists on our individual blogs. click to see how we all fared on vgt's omnivore's 100.

The VGT Omnivore’s Hundred:

1. Venison
2. Nettle tea
3. Huevos rancheros
4. Steak tartare
5. Crocodile
6. Black pudding
7. Cheese fondue
8. Carp
9. Borscht
10. Baba ghanoush
11. Calamari
12. Pho
13. PB&J sandwich
14. Aloo gobi
15. Hot dog from a street cart
16. Epoisses
17. Black truffle
18. Fruit wine made from something other than grapes
19. Steamed pork buns
20. Pistachio ice cream
21. Heirloom tomatoes
22. Fresh wild berries
23. Foie gras
24. Rice and beans
25. Brawn, or head cheese
26. Raw Scotch Bonnet pepper
27. Dulce de leche
28. Oysters
29. Baklava
30. Bagna cauda
31. Wasabi peas
32. Clam chowder in a sourdough bowl
33. Salted lassi
34. Sauerkraut
35. Root beer float
36. Cognac with a fat cigar
37. Clotted cream tea
38. Vodka jelly/Jell-O
39. Gumbo
40. Oxtail
41. Curried goat
42. Whole insects
43. Phaal
44. Goat’s milk
45. Malt whisky from a bottle worth £60/$120 or more
46. Fugu
47. Chicken tikka masala
48. Eel
49. Krispy Kreme original glazed doughnut
50. Sea urchin
51. Prickly pear
52. Umeboshi
53. Abalone
54. Paneer
55. McDonald’s Big Mac Meal
56. Spaetzle
57. Dirty gin martini - many dirty, filthy vodka martinis, actually
58. Beer above 8% ABV
59. Poutine
60. Carob chips
61. S’mores
62. Sweetbreads
63. Kaolin - isn't this clay?!
64. Currywurst
65. Durian
66. Frogs’ legs
67. Beignets, churros, elephant ears or funnel cake
68. Haggis
69. Fried plantain
70. Chitterlings, or andouillette
71. Gazpacho
72. Caviar and blini
73. Louche absinthe
74. Gjetost, or brunost
75. Roadkill
76. Baijiu
77. Hostess Fruit Pie
78. Snail
79. Lapsang souchong
80. Bellini
81. Tom yum
82. Eggs Benedict
83. Pocky
84. Tasting menu at a three-Michelin-star restaurant.
85. Kobe beef
86. Hare
87. Goulash
88. Flowers
89. Horse
90. Criollo chocolate
91. Spam
92. Soft shell crab
93. Rose harissa
94. Catfish
95. Mole poblano
96. Bagel and lox
97. Lobster Thermidor
98. Polenta
99. Jamaican Blue Mountain coffee
100. Snake

doodles' omnivore's 100
maltese parakeet's omnivore's 100
mooncrazy's omnivore's 100

we hope you'll post your own omnivore's 100. if you do, please put a link in the comments.

Thursday, September 04, 2008

Ever start dinner with dessert?

No, me either but here I'm going to start my Labor Day BBQ meal post with my dessert, peach cobbler. I found this fresh peaches and a yummy tender topping made with buttermilk cobbler on Food Network.

This was served after a killer meal of smoked pork, broccoli salad, baked beans, and a few great appetizers. All will appear on future posts but lets get at that peach cobbler, shall we?

Peach Cobbler
It says it serves 6-8 but I doubled it and served 8; maybe we're pigs.

Cobbler filling:
4 cups peeled and sliced fresh peaches
3/4 cup brown sugar
1 teaspoon cinnamon
1 teaspoon vanilla
1 tablespoon flour

Cobbler crust:
1 cup flour
1 teaspoon baking powder
1/2 teaspoon baking soda
3 tablespoons brown sugar
4 tablespoons unsalted butter, cut into small pieces
2/3 cup buttermilk

1 tablespoon brown sugar, for topping.

Preheat over 425 degrees.

Butter a 1 1/2 quart shallow baking dish. Place the sliced peaches in the dish and sprinkle with brown sugar, cinnamon, vanilla and flour. Mix gently and spread evenly again. Bake for 10 minutes.

Meanwhile combine all dry ingredients for cobbler crust in a bowl. Cut in the butter with a pastry cutter or you fingers, to make the texture like course crumbs. Add buttermilk and stir to form a soft dough.

Remove fruit from oven and drop rounded spoons full of dough on top. Sprinkle with last tablespoon of brown sugar and return to oven. Bake until fruit is bubbly and crust topping is golden brown, about 20 minutes. Serve warm with ice cream or whipped cream.

Cooking the peaches for ten minutes before putting on the topping made it so very light and I think kept it from being "doughy" underneath. It was a little bit of heaven floating down to my kitchen.

Last picture? Only one piece left.


Sunday, August 31, 2008

not your typical white person

quick post. when i was buying the ingredients to make up some red beans and rice for our tailgate party tomorrow (go bruins!), i had to ask the butcher if they had any ham hocks because there weren't any out in the open cases. the other person standing at the counter at the time, a black guy about my age, turned to me and said, "ham hocks? you are NOT a typical white person!" i thanked him for the complement and left the store grinning ear to ear!

update - because joanna asked so nicely and she is such a good friend of the blog, here's the recipe. p.s., sorry, j, this won't ever be entered for consideration on the heart of the matter! anyway, here it is...

auntie lil bird's n'awlins red beans and rice

(adapted from emeril's red beans and rice from his louisiana real and rustic cookbook)

1 lb dried small red beans, rinsed and sorted, soaked overnight and drained
2 tbsp canola oil
1 c chopped onions
1/2 c chopped bell pepper
1/2 c chopped celery
2 tsp salt
1 tsp cayenne
1/2 tsp black pepper
1 tsp dried thyme
4 bay leaves
1 lb boiled ham, cut into 1/2 in cubes
1 smoked ham hock (skin scored crosswise)
8 oz smoked sausage, cut in half then into 1/4 in slices (half moons, if you will)
3 tbsp chopped garlic
8 - 10 c water
steamed white rice

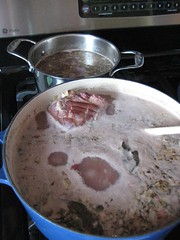
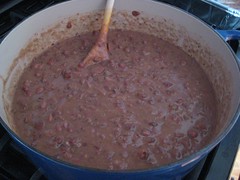
bust out your large heavy pot (le creuset or similar works best) and saute the trinity (onions, peppers, celery) and spices for about 5 mins over med-high heat. add the bay leaves, ham and ham hock and saute for an additional 5 or so minutes. (note, i did not say to add the sausage yet. simon says, back to the beginning!) add the garlic and saute until you start to smell it but before it burns. add the beans and then enough water to cover all ingredients. bring to a boil, then reduce heat. simmer, uncovered, stirring occasionally. add more water, if things start to get too dry and thick. at about the 2 hour mark, take your spoon and start mashing the beans against the side of the pot until you've mashed about 1/2 of the beans. (tip from auntie, do this on the side of the pot that is facing the back of the stove, in case you push the pot, it won't fall off the stove and spill boiling beans all over you!) this is the critical step as this is what gives the dish its creamy texture. now stir in your cut up sausage pieces and continue to stir for another 1 1/2 hours or so until mixture is creamy and beans are soft. feel free to add more water, the texture should be liquid but not watery, ifyaknowwhutimean. before serving, remove the bay leaves and the ham hock, salvage any of the non-fatty meat from the hock and return it to the pot. serve over steamed white rice with plenty of crystal hot sauce and an ice cold abita amber beer.

red beans

as a bit of history - red beans and rice is still typically served on mondays in new orleans. the reason: monday was wash day and a pot of red beans was easy to cook as it could be left relatively unattended while the lady of the house was busy all day in the yard with the laundry.

Friday, August 29, 2008

Where are those women?

You might be wondering where we've been lately. I can answer for all of us. It's just that summer time comes with responsibilities. Friends visiting, hot summer nights that don't require any additional cooking because you've baked your body all day, and let's throw in a bit o' work. Summer is just too much fun to be in the kitchen, well for me it has been. We do promise to get back to it soon.

With the long weekend here and yes, another bbq, I hope to have one new recipe to post on Tuesday but until then, ponder this.

As the days get shorter I'm starting to think of trying something new in the kitchen. I've been toying with a list of recipes I've always wanted to try and before it becomes a novel I should start ticking off a few.

These are by no mean all of my list or in any particular order:

Angel food cake
Dill pickles
Low-fat dishes that are tasty
More outdoor dutch oven cooking
More smoked meats
Chicken Molé
Real sourdough bread from my own starter

The list is growing and maybe when the thermometer dips a bit in the coming months I can tackle something new.

How did your summer go?

Saturday, August 23, 2008

Vegetarians: no monkeys were harmed in the making of this dish

When I'm in a fix for something sweet to make, in a short amount of time, I'll go to my standard, Monkey Bread. It serves as well as a dessert as it does a breakfast treat. I've never had to take any leftovers home. It's so simple it amazes me when people rave about it. Must be the brown sugar and cinnamon, gets them every time. Since there are few ingredients needed I always keep them on hand for that last minute surprise potluck. The refrigerator biscuits last forever. It's scary but I try not to think about it.

Please, no one turn up their noses at the canned biscuits used in this tasty treat. I've made it from scratch and to be honest, I like the texture of the Pillsbury biscuits better. Some recipes call for dipping each piece of dough in butter then rolling in sugar. Takes too much time and, again, not much different in the final product.

Monkey Bread
4 cans Pillsbury Buttermilk Biscuits, ten in the can. I buy 4 wrapped together in their "value pack"
1 cup sugar
1 tablespoon cinnamon (sometimes I throw in a bit of fresh nutmeg, too)
1 cup brown sugar, packed
1 stick unsalted butter (do not use margarine)

Grease the sides of a tube/bundt pan.
Mix white sugar and cinnamon together and put in a bag.

Open cans one at a time and cut each biscuit into four pieces. Put all of the one can's cut biscuits into the bag with the cinnamon sugar and shake to coat the pieces.

Start layering the biscuits into the prepared pan. If you desire, you can add chopped nuts or raisins with each layer. Do each can then set aside as you make the syrup.

Melt the butter and brown sugar in a small pan. Bring to a boil and cook for about two minutes stirring continuously. Pour over biscuits in prepared pan.

Bake in 350 oven for about 30-40 minutes until they biscuits are golden and puffed. Don't over bake. Let cool for about 10/15 minutes or so; if not, all the monkeys fall out. Run a knife around the edge of the pan and turn upside down on a plate.

Serve warm or cold. Use a fork to separate a piece, cutting can be difficult unless it's cold.

I'd like to show a photo but every time I make this I'm rushing out the door.

Sunday, August 17, 2008

Rigatoni with Roasted Red Peppers


One morning laying on the sofa trying to rid myself of a crummy sinus headache......what better way to take your mind off of your ills than by watching someone cook on TV, just seems to take me elsewhere. Well I ran across an older spot by Giada De Laurentis...........sounded so easy I knew I had to try it..........cause it had all the ingredients we like.

Couple of comments about the following recipe....

  • don't overpower the rigatoni with too much of the bread crumbs
  • I used my own red peppers that I roasted on the BBQ......you can use jarred red peppers but make sure they are packed in water and not oil
  • I also added a bit more garlic cloves while pulsing the croûtons
  • Also when toasting your almonds..careful not to burn them.......med heat, five minutes. Keep shaking the pan to move the almonds around.
  • use rigatoni as with the little ridges it hold the bread crumb mixture.

1 pound rigatoni pasta
3 cups purchased garlic-flavored croûtons, (about 5 ounces)
1/4 cup slivered almonds (about 1 ounce), toasted
1 cup julienned roasted red bell peppers
3/4 cup extra-virgin olive oil

Bring a large pot of salted water to a boil over high heat. Add the pasta and cook until tender but still firm to the bite, stirring occasionally, about 8 to 10 minutes. Drain pasta into a large bowl.

Place the extra garlic, croutons and the almonds in a food processor. Pulse until it becomes the texture of bread crumbs. Add the mixture to the hot pasta. Add the peppers and the olive oil. Toss to combine and serve.

Now if you are someone who likes to have tomato sauce on your pasta.........this dish is not for you. My sweet husband is a purist and likes tomato sauce on his pasta, so I took a big chance with this dish, but he LOVED it.........the man never ceases to amaze me.

Saturday, August 16, 2008

The answer

The can on the left was the product I was hoping someone would identify. One person said it was baking powder, Laura from Laura Rebecca's Kitchen and she was as wrong as me. I picked up this can at Trader Joe's thinking:
  • I need baking powder
  • baking powder comes in a round can
  • baking soda comes in a square box
  • I'm in such a hurry
I then went home to bake some cookies that have three teaspoons of baking powder. I was baking them for a gallery opening I was involved in. When I tasted them they had a very flat flavor with an aftertaste. They were frosted with a great ganache, what's not to love there, but they still were a bit off. I've made this recipe before and for the life of me, I couldn't figure out the problem.

Fast forward to last week when I got out the ingredients for biscuits and actually read the can. Yikes! I'd used baking soda instead of baking powder. I don't know about you but I'm a very graphic person and relied on my memory of what the can looked like and failed to read the label.

Laura Rebecca, because you were as smart as I was and thought the can looked like baking powder I'm sending you a homemade felt lapel pin. Just contact me with a mailing address via e-mail.

Everyone else, be wary of just grabbing something to use before you read the label. I know I shall not make that mistake again.

Wednesday, August 13, 2008

Can you guess?

How about a game today?

Who can tell us: what's this product?

One comment said Baking Powder. Who thinks this is Baking Powder? Go look at your's in the cupboard.

Post a comment with your guess. If no one can answer I'll post a hint, tomorrow. I might even have a prize but just the knowledge that you are smarter than Moon is worth a lot. Wait, there are many smarter than Moon. I should give a prize.

Click the comments, all comments welcome. If you are a "nonny mouse" include your e-mail.

Saturday, August 09, 2008

i heart trader joe's

have i said that before? well, let me say it again. not only are they cheaper than the supermarkets, their selection is better and fresher and they offer so many options that are better for you and the environment.

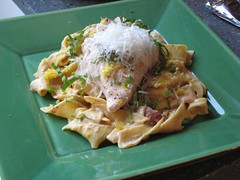
i made this lemon pepper papardelle with sundried tomato alfredo sauce and grilled chicken for my grandmother's recent visit. it was a perfect summer afternoon meal and we enjoyed the meal and each other's company with a nice rex goliath pinot grigio.

here's the tj's shopping list:

sundried tomatoes (the dry ones, not the ones in oil)
garlic
kosher chicken breasts
lemon pepper papardelle
alfredo sauce
basil
lemon
parmesan cheese
pinot grigio

grill chicken and cut into slices. chop sundried tomatoes into strips and simmer with one or two smashed cloves of garlic in some of the wine until soft. add jar of alfredo sauce and simmer until flavors blend. meanwhile, boil the papardelle until al dente. drain pasta, add to sauce and heat over low for a few minutes so the pasta finishes cooking and soaks up some of the sauce. plate pasta and put the grilled chicken on top. garnish with grated parmesan cheese, basil ribbons and lemon zest. enjoy with a glass of the wine!

Friday, August 08, 2008

Appetizer

We are very excited Doodles won their contest so here is another recipe from the magazine. This time I'll let you go buy Cook's Country or at very least, join online. I made this as an appetizer for last weekend's dinner party and it was very successful. It does take some pre-prep but then it goes together quickly.

The whole trick to this is instead of making a normal pizza dough with yeast you make a dough with beer. Because you don't need it to rise you can roll it out and slap it in the skillet. I wanted to have them ready to go so I rolled them out and slapped them between two pieces of waxed paper and slapped them in the refrigerator. I love slapping things.

When it came time to fix them I oiled my non-stick pan and cooked the first side. When it's nice and crispy flip it over, load on the toppings and cover until the bottom is crisp and the chees is melty. This is all similar to the pizza on the grill, another America Test Kitchen recipe, that is fun, but a lot more work. I cut them into bit sized pieces and served them hot. Six adults when through three nine-inch pizzas quickly and if I didn't already have dinner cooked I might have made more.

Photo editor's note: Before I slid the last pizza out on the cutting board, plastic; I set down the pan to take a snap. When I lifted the pan, the cutting board came with it. Glad this was my last pizza. Just a little calamity in the kitchen, when it all cooled it was easy to scrap the melted plastic off the skillet bottom but the board, not so lucky. I was happy to see it bore the little recycle triangle so at least it could be made into something else.

Sunday, August 03, 2008

If you are not drooling …


When Doodle's won the recipe contest in the September issue of Cook's Country I, of course, picked up the magazine. I do enjoy this magazine because they have no ads only good recipes and a few hints and product reviews. I was not disappointed with this issue and tried a number of recipes for a dinner this weekend.

Often, when going to a potluck or planning an informal dinner get-together, I want a simple dessert that's portable. There is nothing more difficult than trying to get a fancy dessert on the road. I'd rather be a roadie for a rock band than have to transport something with whipped cream. This unbelievably light lemon sheet cake answered both those requests, and did I mention, it was easy and delicious.

I did not change this recipe one bit but my cake texture was not as dense as the picture in the magazine. Mine turned out very fluffy with lots of crumbs. I might have beat mine longer but it didn't seem to affect the flavor. The sugar and zest combo on the top was great. The topping gave a bit of crunch to the, other wise, tender cake.

Lemon Buttermilk Sheet Cake
serves 16

Cake:
2 1/2 cups cake flour
1 teaspoon baking powder
1/2 teaspoon baking soda
1/2 teaspoon salt
3/4 cup buttermilk, room temp
3 tablespoons grated zest and 1/4 cup juice from 3 large lemons
1 teaspoon vanilla
1 3/4 cups granulated sugar
1 1/2 sticks of softened unsalted butter
3 large eggs plus 1 yolk, room temp

Glaze:
3 cups confectioners' sugar
3 tablespoons lemon juice
2 tablespoons buttermilk

For the cake: heat oven 325 degrees. Grease and flour 13x9 baking pan. Combine flour, baking powder, baking soda, and salt in medium bowl. Combine buttermilk, lemon juice, and vanilla.

With electric mixer on medium speed, beat granulated sugar and lemon zest until moist and fragrant, about 1 minute. Transfer 1/4 cup sugar mixture to small bowl, cover, and reserve. Add butter to remaining sugar mixture and beat until light and fluffy, about 2 minutes. Beat in eggs and yolk, one at a time, until incorporated. Reduce speed to low. Add flour mixture in 3 additions, alternating with 2 additions of buttermilk mixture, and mix until smooth, about 30 seconds.

Scrape batter into pan and smooth top. Bake until cake is golden brown and tooth pick inserted into center comes out clean, 25-35 minutes. Transfer cake pan to wire rack and let cool 10 minutes.

For the glaze: Whisk confectioners' sugar, lemon juice, and buttermilk until smooth. Gently spread glaze over warm cake and sprinkle evenly with reserved sugar mixture. Cool completely, two hours. Serve.